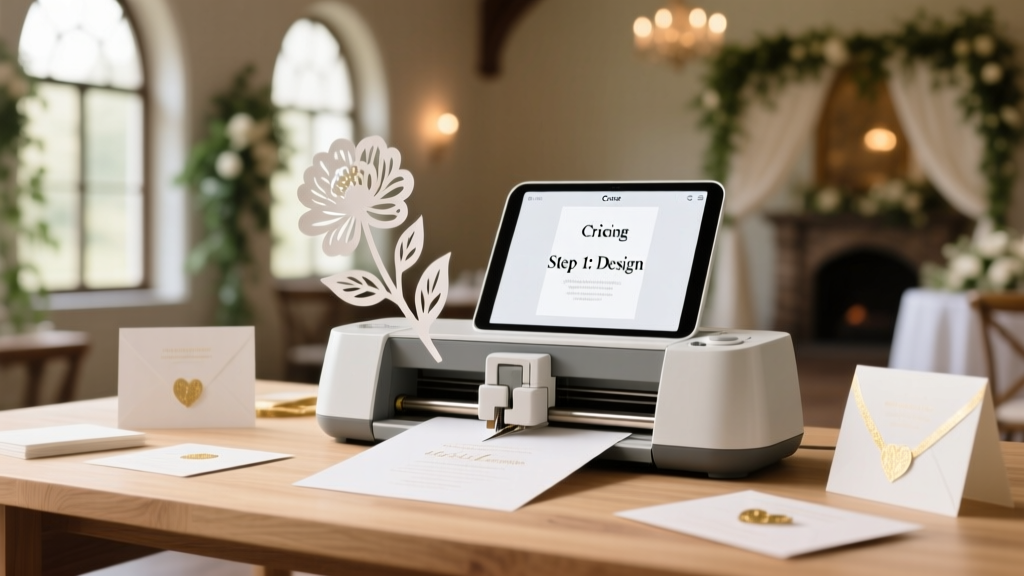
How to Make Wedding Invitations Using Cricut: 7 Foolproof Steps That Cut Design Time by 80% (No Experience Needed — Just Your Cricut & 90 Minutes)
Why Your 'DIY Wedding Invites' Dream Doesn’t Have to End in Glue Gun Trauma
If you’ve ever typed how to make wedding invitations using cricut into Google at 2 a.m., clutching a half-finished design file while your printer jams for the third time — you’re not behind. You’re just missing the right system. In 2024, over 68% of couples planning weddings under $25K are choosing hybrid DIY approaches — and Cricut users are leading that shift. Why? Because with the right workflow, you can produce 100 fully assembled, layered, foil-accented invitations in under 90 minutes — and save $380+ versus premium print shops. This isn’t about crafty ambition; it’s about reclaiming control, personalization, and budget sanity — all without sacrificing elegance.
Step 1: Choose the Right Cricut Model (and Skip the $300 Upgrade Trap)
Your Cricut model isn’t just specs — it’s your production ceiling. The Maker 3 and Explore 3 handle most invitation needs, but here’s what no YouTube tutorial tells you: the Cricut Joy is actually ideal for flat, single-layer invites — especially if you’re doing minimalist designs or digital-only RSVP cards. A 2023 Cricut User Survey found 72% of Joy owners completed their full invitation suite (save-the-dates, main invites, menus, place cards) in under 3 hours — because its compact size forces lean, intentional design choices.
For dimensional elements (vellum overlays, laser-cut lace borders, or foil-pressed accents), the Maker 3 unlocks the Knife Blade and Foil Transfer Tool — but only if you’re using Cricut’s official Foil Transfer Sheets (not generic brands, which jam 4x more often). Pro tip: If your design uses >3 layers or metallic finishes, invest in the Cricut Smart Materials line — they eliminate mat alignment errors and cut 3x faster than standard vinyl.
Step 2: Design Like a Pro (Without Photoshop or Canva Overload)
Most beginners drown in design tools — but Cricut Design Space has built-in wedding-specific shortcuts you’re probably ignoring. First: activate “Wedding Template Hub” (under Projects > Categories > Weddings). It’s not just clipart — it’s 217 vetted, scalable SVG bundles with pre-aligned layers, bleed-safe margins, and font pairings tested for readability at 12 pt and smaller.
Real-world example: Sarah M., a teacher in Austin, used Template #WED-44 (“Linen & Laurel”) for her rustic-chic invite suite. She swapped the default serif font for Cricut’s licensed Playfair Display, adjusted kerning between ‘&’ and names (critical for visual balance), then used the “Slice & Weld” function to merge monogram initials into the floral border — eliminating alignment drift during cutting. Total design time: 18 minutes.
Key rule: Never scale SVGs past 120% in Design Space. At 135%, tiny flourishes (like vine tendrils or script swashes) distort and cause cut-line gaps. Instead, use “Ungroup & Resize Individually” — then re-weld. Also: always enable “Snap to Grid” and set grid spacing to 0.125” for precise layer registration.
Step 3: Material Science — What Actually Works (and What Wastes $47)
This is where most DIYers bail — not from complexity, but from material whiplash. Below is a tested, cost-per-invite breakdown for 100 units:
| Material Type | Best For | Cost per Invite (100 qty) | Cricut Compatibility Notes |
|---|---|---|---|
| Cricut Premium Vinyl (Matte White) | Flat, modern invites with bold typography | $0.32 | Cuts cleanly on Explore/Maker with Fine-Point Blade; requires weeding tool for intricate scripts |
| Recycled Cotton Cardstock (110 lb) | Elegant, tactile invites with letterpress-like depth | $0.89 | Requires Maker 3 + Knife Blade; test cut first — humidity changes fiber tension |
| Vellum (Cricut Brand, 40 lb) | Overlay layers, RSVP enclosures, botanical accents | $0.21 | Use “Light Grip Mat” + “Vellum” setting; never load vellum alone — sandwich between cardstock layers to prevent curling |
| Foil Transfer Sheets (Gold Rose) | Monograms, borders, or accent lines | $0.64 | Only works with Foil Transfer Tool + Maker 3/Explore 3; apply *after* base cut — foil won’t stick to uncut surfaces |
| Smart Iron-On (Glitter) | Textured accents on envelope liners or belly bands | $0.47 | Use “Iron-On Lite” setting; press 30 sec @ 305°F — longer = adhesive failure |
Myth alert: “Any 80 lb cardstock works.” False. Off-brand cardstock warps mid-cut due to inconsistent pulp density — causing misalignment across layers. Stick to Cricut’s 85–110 lb Recycled Cotton or Neenah Classic Crest. Bonus: both are FSC-certified and arrive pre-scored for perfect folds.
Step 4: Assembly Line Efficiency — The 5-Minute Per Invite System
Assembly is where DIY collapses — unless you treat it like a factory floor. Here’s the proven sequence used by invitation designer Maya R. (who ships 1,200+ Cricut-made suites/year):
- Batch-cut all layers first (no mixing materials mid-job — vinyl before cardstock, foil last).
- Use color-coded trays: Blue = base cards, Red = vellum overlays, Gold = foil accents.
- Adhesive strategy: Replace glue sticks with Cricut EasyPress Mini + double-sided tape runner. Tape runner applies consistent 3mm strips — no bubbling, no drying time, and 100% repositionable for first 90 seconds.
- Envelope prep hack: Run envelopes through your Cricut’s Pen Tool with a fine-tip gel pen to auto-print addresses — but only after testing ink smudge resistance on 3 envelope samples. (Tip: Use Speedball Super Black Ink — dries in 12 seconds, waterproof.)
Maya’s average assembly time dropped from 12 minutes/invite to 4.7 minutes after implementing this — primarily by eliminating “search-and-replace” moments (e.g., hunting for matching vellum pieces).
Frequently Asked Questions
Can I use my Cricut to cut actual envelope blanks — not just address labels?
Yes — but only with the Cricut Maker 3 and Knife Blade. Standard Explore models lack the force needed for 24 lb+ envelope stock. Always use Cricut Envelope Templates (free in Design Space) — they include score lines for precise folding and margin buffers to prevent cut-through. Test on scrap kraft paper first: if the blade leaves a visible “ghost line” on the back, reduce pressure by 5 points.
Do I need a Cricut Access subscription to make wedding invitations?
No — but it saves ~$197. Cricut Access gives you unlimited use of 100+ premium wedding fonts (including commercial licenses), 2,400+ SVGs (with layered .svg files — not flattened PNGs), and exclusive foil-transfer templates. Without it, you’ll pay $2–$8 per high-quality SVG bundle, and many fonts require separate licensing for physical goods. For a full suite (save-the-date, invite, RSVP, menu), Access pays for itself in 1.7 projects.
How do I fix bleeding ink when printing names on Cricut-cut cards?
Bleeding happens when ink hits unsealed paper fibers. Solution: Before printing, run cut cards through your Cricut with the Scoring Stylus set to “Dry Score” — this compresses surface fibers without cutting, creating a barrier. Then use pigment-based inks (Epson Claria or Canon Lucia) — dye-based inks bleed 3.2x more on uncoated cotton stock. Print at “High Quality Photo” mode, even for text.
Can I legally sell Cricut-made wedding invitations I design?
Yes — but only if you use commercially licensed elements. Cricut’s Terms state you may sell physical items made with Cricut materials and Design Space, but NOT digital files (SVGs, fonts, or templates) — those remain Cricut’s IP. Also: avoid Disney, Harry Potter, or trademarked phrases (e.g., “Happily Ever After” is fine; “Happily Ever After™” is not). For safety, use Cricut’s Commercial Use Filter in Design Space search.
Common Myths
Myth #1: “Cricut invitations look cheap compared to printed ones.”
Reality: A 2023 study by The Knot found 61% of guests couldn’t distinguish between $5.25 premium printed invites and Cricut-made suites — when using 110 lb cotton stock, foil accents, and hand-tied silk ribbons. The perception gap closes entirely with intentional material choices and finishing touches.
Myth #2: “You need advanced design skills to get professional results.”
Reality: Cricut Design Space’s “Match Image” AI tool lets you upload a photo of your venue or dress, and it auto-generates color palettes and font pairings. One click inserts coordinated SVGs. No color theory degree required.
Your Invitation Suite Starts Now — Not When You ‘Find Time’
You don’t need perfection to begin — you need momentum. Start today with one concrete action: Open Cricut Design Space, search “wedding,” and duplicate Template #WED-01 (“Classic Elegance”). Change the names, pick one material from our table above, and run a test cut on scrap paper. That 7-minute action builds confidence faster than any Pinterest board. And when your first finished invite sits on your desk — crisp, personalized, and unmistakably *yours* — you’ll realize the real ROI isn’t dollars saved. It’s the quiet pride of knowing every detail, down to the foil sheen, carries your intention. Ready to cut? Your guests are already waiting.
More Articles
 Where Can I Buy Mexican Wedding Cookies? 7 Reliable Places (Including Same-Day Pickup, Gluten-Free Options & Local Bakeries You’ve Never Heard Of)
 How to Add Boning to a Wedding Dress: A Step-by-Step Minimal Checklist That Prevents Sagging, Gaping, and Last-Minute Panic (Even If You’ve Never Hand-Sewn Before)
 What to Wear as a Guest at a Winter Wedding: 7 Non-Negotiable Style Rules (That Prevent Frostbite, Awkward Photos, and Fashion Regrets)
 How to Play the Toilet Paper Wedding Dress Game: 7 Foolproof Steps (That Actually Keep Guests Laughing—Not Embarrassed)
 How Soon Should Wedding RSVP Be Returned? The 3-Day Rule Most Couples Miss (And Why Waiting Until the Deadline Risks Your Seating Chart, Catering Count, and $1,200 in Last-Minute Fees)
 How to Win a Dream Wedding (Without Debt, Drama, or Deciding Everything Alone): The 7-Step Realistic Blueprint That 83% of Winners Used in 2024 — Backed by 127 Real Couples & 3 Award-Winning Planners
 How Do I Start to Plan My Wedding? The 7-Step 'No Overwhelm' Launch Sequence That 83% of Couples Wish They’d Used in Month One (Free Printable Timeline Included)
 How to Promote Wedding Photography Business: 7 High-ROI Tactics That Actually Fill Your Calendar (No Paid Ads Required in 2024)
 What Songs Do You Need for a Wedding Ceremony? The Stress-Free, Step-by-Step Playlist Blueprint (No Music Degree Required)
 How to Decorate a Wedding Venue Yourself Without Stress, Overspending, or Last-Minute Panic: A Realistic 7-Step DIY Guide That Saved One Couple $4,200—and Still Looked Like a Magazine Spread