A sheet, a string of lights, and your cousin’s DSLR—your wedding photo booth, no DIY guilt required
If you're looking for a fun, budget-friendly way to entertain guests and capture memorable moments, a do it yourself wedding photo booth is an excellent choice. This customizable setup allows couples to express their personality while encouraging interaction among attendees. By combining thoughtful design, affordable materials, and smart tech integration, you can create a fully functional photo station that rivals professional services—all without overspending. A well-planned DIY wedding photo booth not only enhances the celebration atmosphere but also gives guests a unique keepsake from your special day.
Why Choose a DIY Wedding Photo Booth?
Opting for a do it yourself wedding photo booth offers several advantages over renting a traditional one. First, it significantly reduces costs—professional photo booths can range from $300 to over $1,000 depending on location and features. With a homemade version, most supplies can be sourced for under $150, especially if you already own a camera or smartphone tripod.
Beyond affordability, a DIY approach provides full creative control. You can tailor the backdrop, props, and layout to match your wedding theme, color palette, and personal style. Whether you’re hosting a rustic barn wedding, a beachside ceremony, or a vintage-inspired reception, your photo booth can reflect those details seamlessly.
Additionally, building your own photo booth encourages involvement from friends and family. Assigning loved ones to help assemble props or manage the station during the event fosters teamwork and makes the experience more meaningful.
Essential Components of a DIY Wedding Photo Booth
To ensure your DIY wedding photo booth functions smoothly and looks great, include these core elements:
- Camera or Smartphone: Use a high-resolution phone or digital camera mounted securely on a tripod.
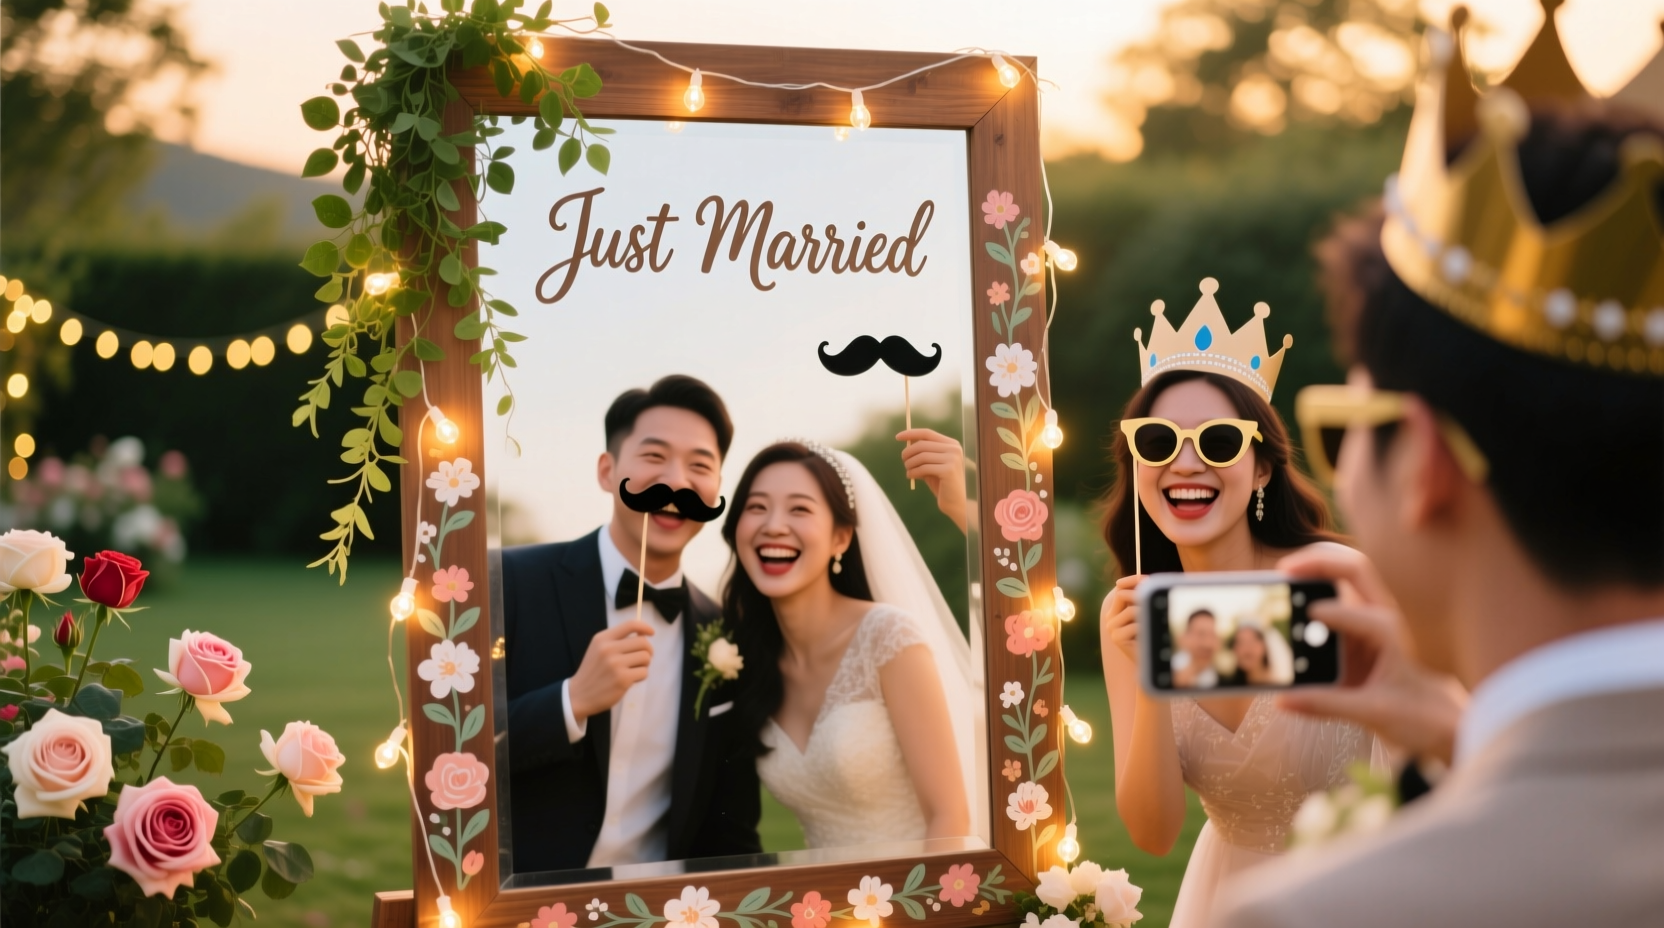
- Backdrop: Choose a visually appealing background that complements your décor (e.g., floral walls, fabric drapes, string lights).
- Lighting: Proper illumination ensures clear, flattering photos. Softbox lights or LED strips work well.
- Props: Include themed signs, hats, glasses, and handheld items that reflect your personalities.
- Photo Sharing Option: Set up instant printing or a digital sharing system via email or social media.
- Signage: Add a cute sign like "Say Cheese!" or "Snap a Memory" to invite guests in.
Selecting the Perfect Backdrop
The backdrop is the visual anchor of any DIY wedding photo booth. It should stand out enough to draw attention but still blend with your overall aesthetic. Consider these popular options:
- Fabric Draping: Use tulle, chiffon, or velvet in your wedding colors. Hang from a pole or frame for an elegant look.
- Paper Flower Walls: Handmade or pre-assembled paper blooms add texture and romance.
- String Lights: Fairy lights or Edison bulbs create a warm, magical glow, especially effective at evening events.
- Chalkboard or Wooden Signs: Personalize with your names and wedding date.
- Themed Murals: For destination or seasonal weddings, consider painted scenes (e.g., Paris skyline, autumn forest).
Avoid cluttered or overly busy patterns that distract from faces. Solid colors or subtle gradients often produce the cleanest results in photographs.
Choosing the Right Camera and Setup
You don’t need expensive equipment to get great shots. Most modern smartphones have excellent cameras capable of producing high-quality images. If using a phone:
- Enable grid lines for better composition.
- Clean the lens before use.
- Use a remote shutter or timer to avoid blur.
If using a DSLR or mirrorless camera:
- Set to aperture priority mode (f/4–f/5.6) for sharp focus.
- Use continuous shooting mode for group poses.
- Attach a wide-angle lens if space is limited.
Mount your device on a sturdy tripod and position it at eye level. Test angles beforehand to ensure no awkward cropping. Place the setup in a well-lit area away from direct sunlight or harsh shadows.
Lighting Tips for Flattering Photos
Even the best camera won’t compensate for poor lighting. Natural light is ideal, so place your DIY wedding photo booth near windows if indoors. Outdoors, avoid midday sun; instead, schedule peak usage during golden hour (late afternoon).
For indoor venues with dim lighting:
- Use two softbox lights positioned at 45-degree angles to reduce facial shadows.
- Ring lights provide even, circular illumination perfect for close-ups.
- LED strip lights behind the backdrop add depth and ambiance.
Avoid fluorescent overhead lighting, which can cast unflattering greenish tones. Always take test photos under actual conditions to adjust white balance and exposure settings accordingly.
Creative and Themed Props Ideas
Props make a do it yourself wedding photo booth interactive and fun. They encourage guests to let loose and engage with the moment. When selecting props, aim for variety and relevance:
- Personalized Frames: Cutouts shaped like picture frames with handles, featuring your initials or wedding hashtag.
- Speech Bubbles: Hold-up signs with phrases like "Just Married," "Crazy in Love," or "She Said Yes!"
- Costume Accessories: Mustaches on sticks, oversized sunglasses, feather boas, top hats, or bridal tiaras.
- Cultural Touches: Incorporate elements from your heritage—fans, kimonos, sombreros, etc.—for cross-cultural weddings.
- Seasonal Items: Snowflakes for winter, sunflowers for summer, pumpkins for fall.
Store props in a decorated box labeled "Fun Zone" or "Prop Bar" to keep them organized and inviting. Rotate them every few hours to maintain novelty.
How to Enable Instant Photo Sharing
One major benefit of professional booths is instant prints. You can replicate this affordably with a few tools:
- Portable Printer: Devices like the Canon Ivy or Polaroid Hi-Print connect wirelessly to smartphones and print credit-card-sized photos instantly.
- Digital Album Link: Create a shared Google Photos album. Display a QR code at the booth so guests can scan and upload images directly.
- Email Capture: Use an app like GuestBooth or Boomerang Fun Pics to collect guest emails and send digital copies post-event.
- Hashtag Display: Encourage guests to post on Instagram with your custom wedding hashtag for a live social feed.
Make sure your Wi-Fi connection is stable if relying on cloud-based sharing. Have a backup storage option (like a USB drive) just in case.
Budget-Friendly Materials and Where to Buy Them
Creating a do it yourself wedding photo booth doesn't require luxury spending. Here’s a sample cost breakdown:
| Item | Affordable Option | Estimated Cost |
|---|---|---|
| Tripod | Universal phone/tablet mount | $15 |
| Backdrop | Foldable fabric panel or streamers | $20–$40 |
| Lighting | LED ring light or string lights | $25 |
| Props | Printed cutouts + craft supplies | $30 |
| Printer | Mini wireless photo printer | $80 |
| Miscellaneous | Tape, scissors, signage | $10 |
| Total | $180 |
Shop at dollar stores, craft retailers (Michaels, Hobby Lobby), Amazon, or Etsy for deals. Borrow items like tripods or printers from friends to cut costs further.
Common Mistakes to Avoid
While creating a DIY wedding photo booth seems straightforward, common pitfalls can affect usability and enjoyment:
- Poor Placement: Don’t put the booth in a dark corner or high-traffic aisle. Choose a visible yet spacious spot.
- Unclear Instructions: Guests may hesitate without guidance. Post simple directions: "Take a pic, share online, grab a print!"
- Ignoring Tech Needs: Ensure your phone has enough storage and battery life. Bring a portable charger.
- Overcomplicating Design: Too many props or complex setups slow down usage. Keep it intuitive.
- No Attendant: Assign someone to monitor the station, refill paper, troubleshoot issues, and encourage participation.
Customizing Your Booth for Different Wedding Themes
Your DIY wedding photo booth should harmonize with your event’s theme. Here are some ideas:
- Rustic Chic: Use burlap banners, mason jars, and wooden crates. Add wildflower garlands.
- Modern Minimalist: Opt for solid-color backdrops (white, black, blush) and geometric shapes.
- Vintage Glamour: Velvet curtains, gold-framed mirrors, and antique-style props enhance elegance.
- Beach Wedding: Seashell wreaths, driftwood signs, and ocean-blue fabrics set the mood.
- Winter Wonderland: Imitation snow, silver glitter, and faux fur throws create a cozy vibe.
Incorporate your wedding hashtag into the backdrop or prop signs to boost social media engagement.
FAQs About DIY Wedding Photo Booths
- Do I need a photographer to run the booth?
No, but assign a tech-savvy friend or family member to supervise and assist guests as needed. - Can I rent parts instead of buying?
Yes—check local rental shops for backdrops, lighting kits, or printers to save money. - How do I protect equipment from weather?
If outdoors, use waterproof covers and place gear under a canopy or tent. - What if guests don’t use it?
Encourage participation by announcing it during speeches or offering small incentives (e.g., entry into a prize drawing). - Can I reuse the booth after the wedding?
Absolutely! Repurpose components for future parties, baby showers, or home décor.
A thoughtfully designed do it yourself wedding photo booth adds joy, creativity, and lasting memories to your big day. With careful planning and attention to detail, you can deliver a professional-quality experience that delights guests and fits your budget perfectly.
More Articles
 From heirloom redesigns to memorial garden markers—ten ways old wedding bands find new meaning
 Lace collars, knee-length skirts, and hushed tones—church wedding guest style decoded
 Champagne, blush, or midnight blue—why second marriages call for dresses that whisper confidence, not tradition
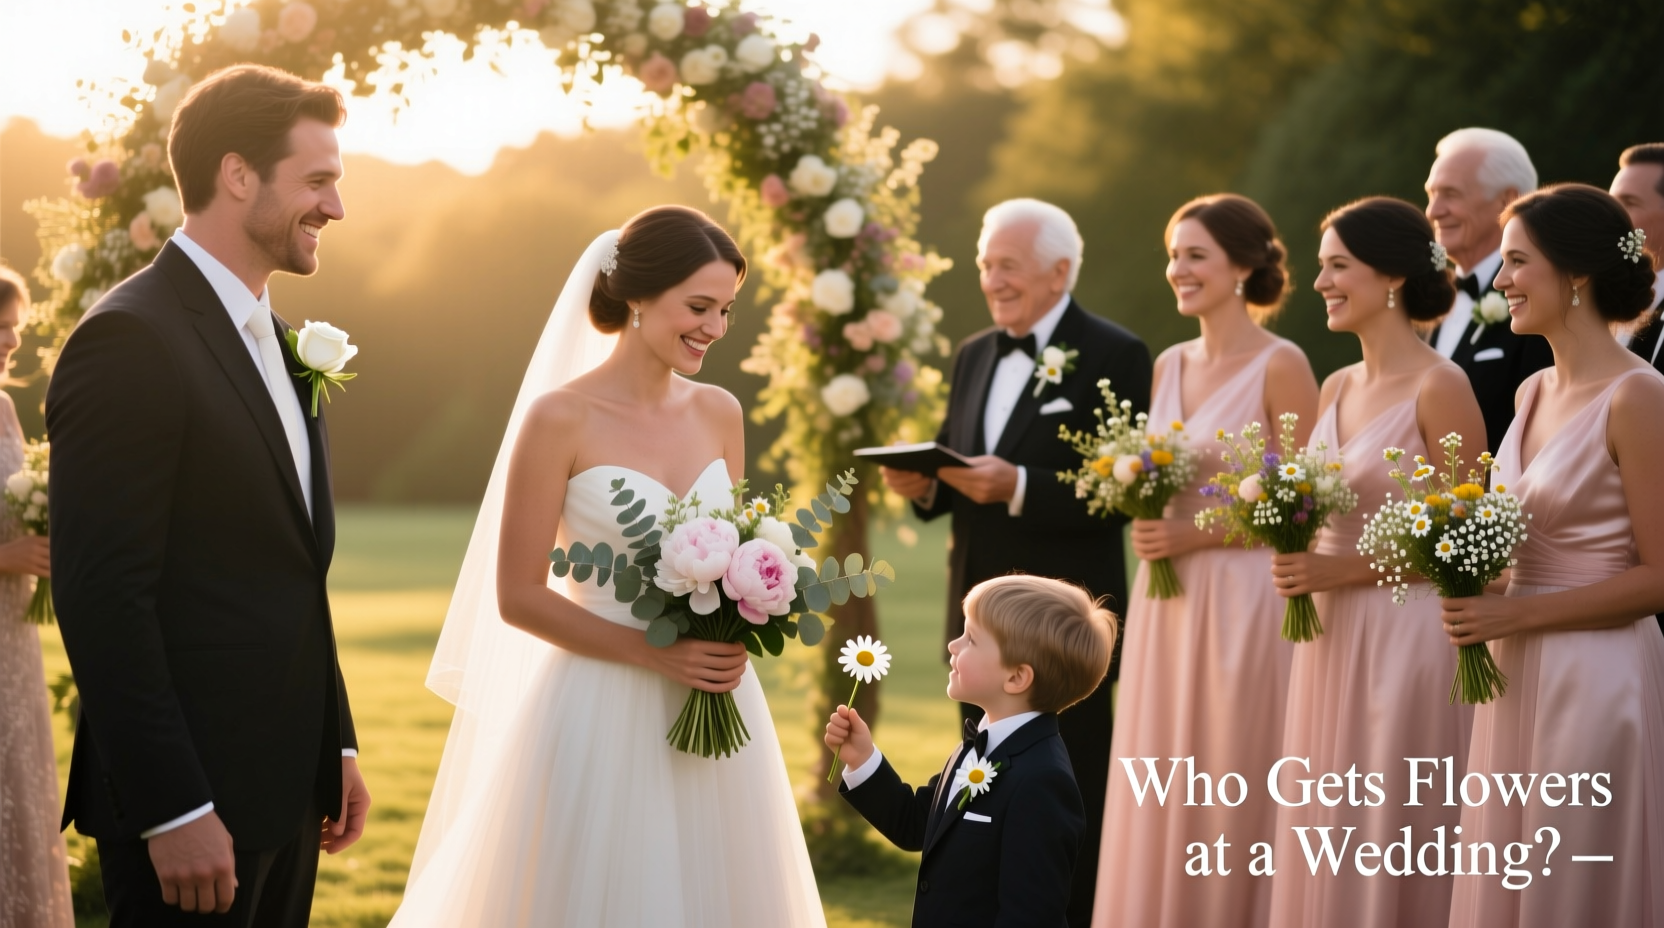 From ring bearers to step-grandmothers—everyone who walks away with a stem or spray
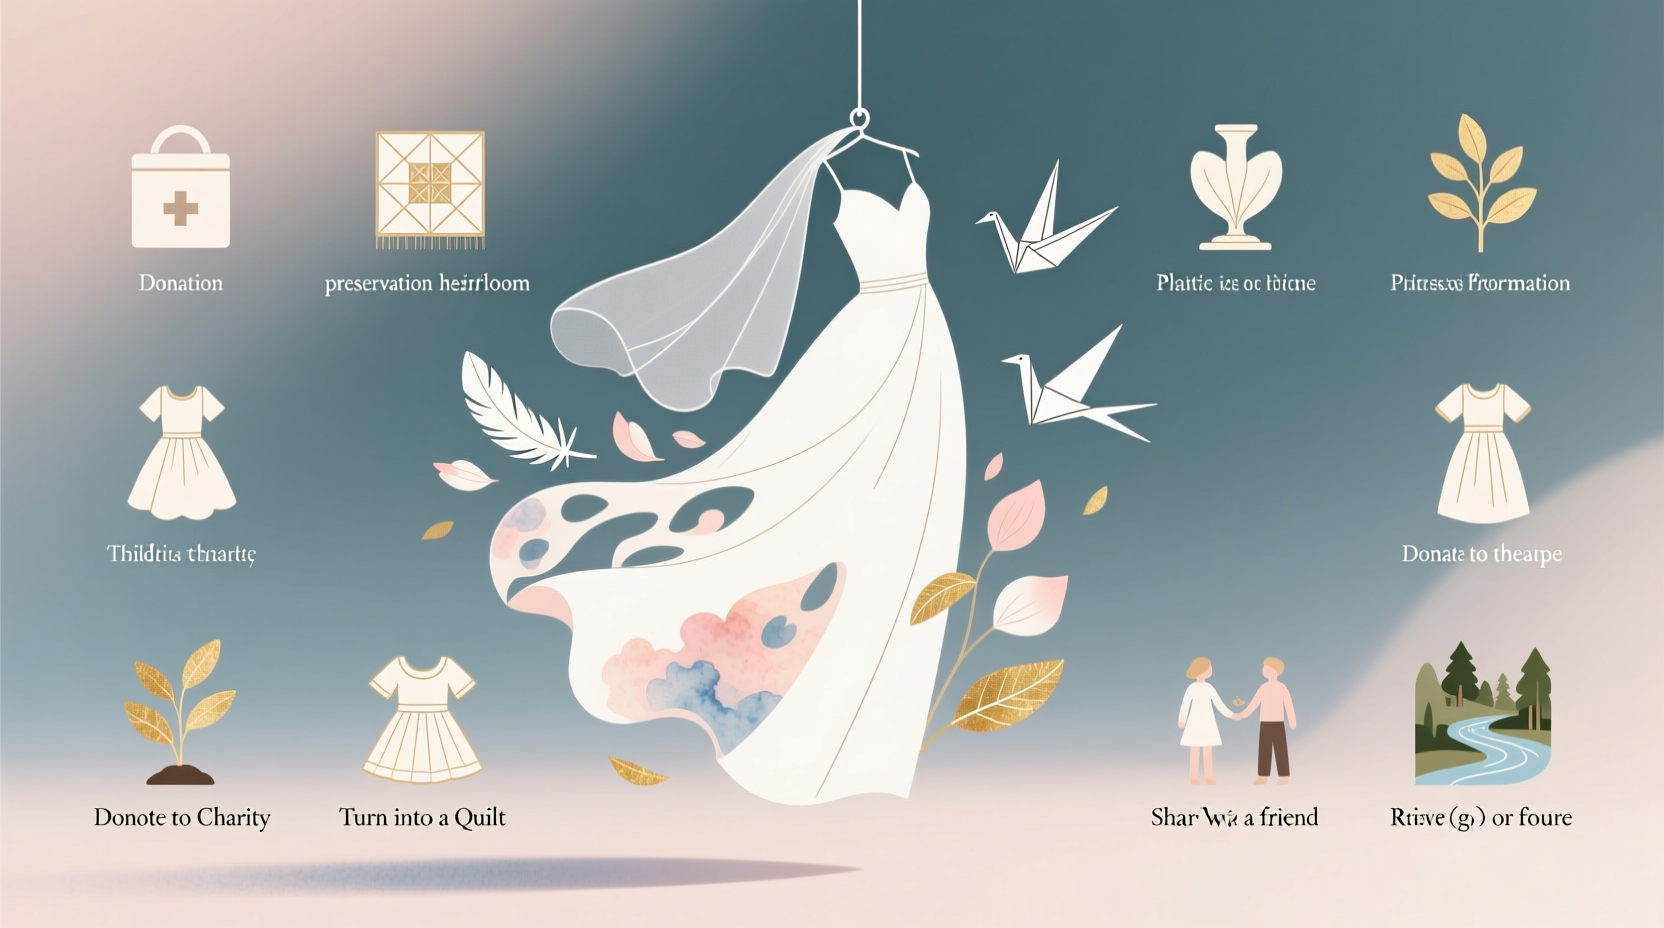 Your wedding dress carried a chapter—now it’s time to write the next one, not tuck it into a box forever
 Fifty years married? Let gold do the talking—in candlelight, calligraphy, and the clink of vintage flutes
 The lasso ceremony, the ‘mordida,’ and why your bouquet might arrive wrapped in banana leaves
 $150 from cousins, $500 from parents, and why your gift says more about your relationship than your bank balance
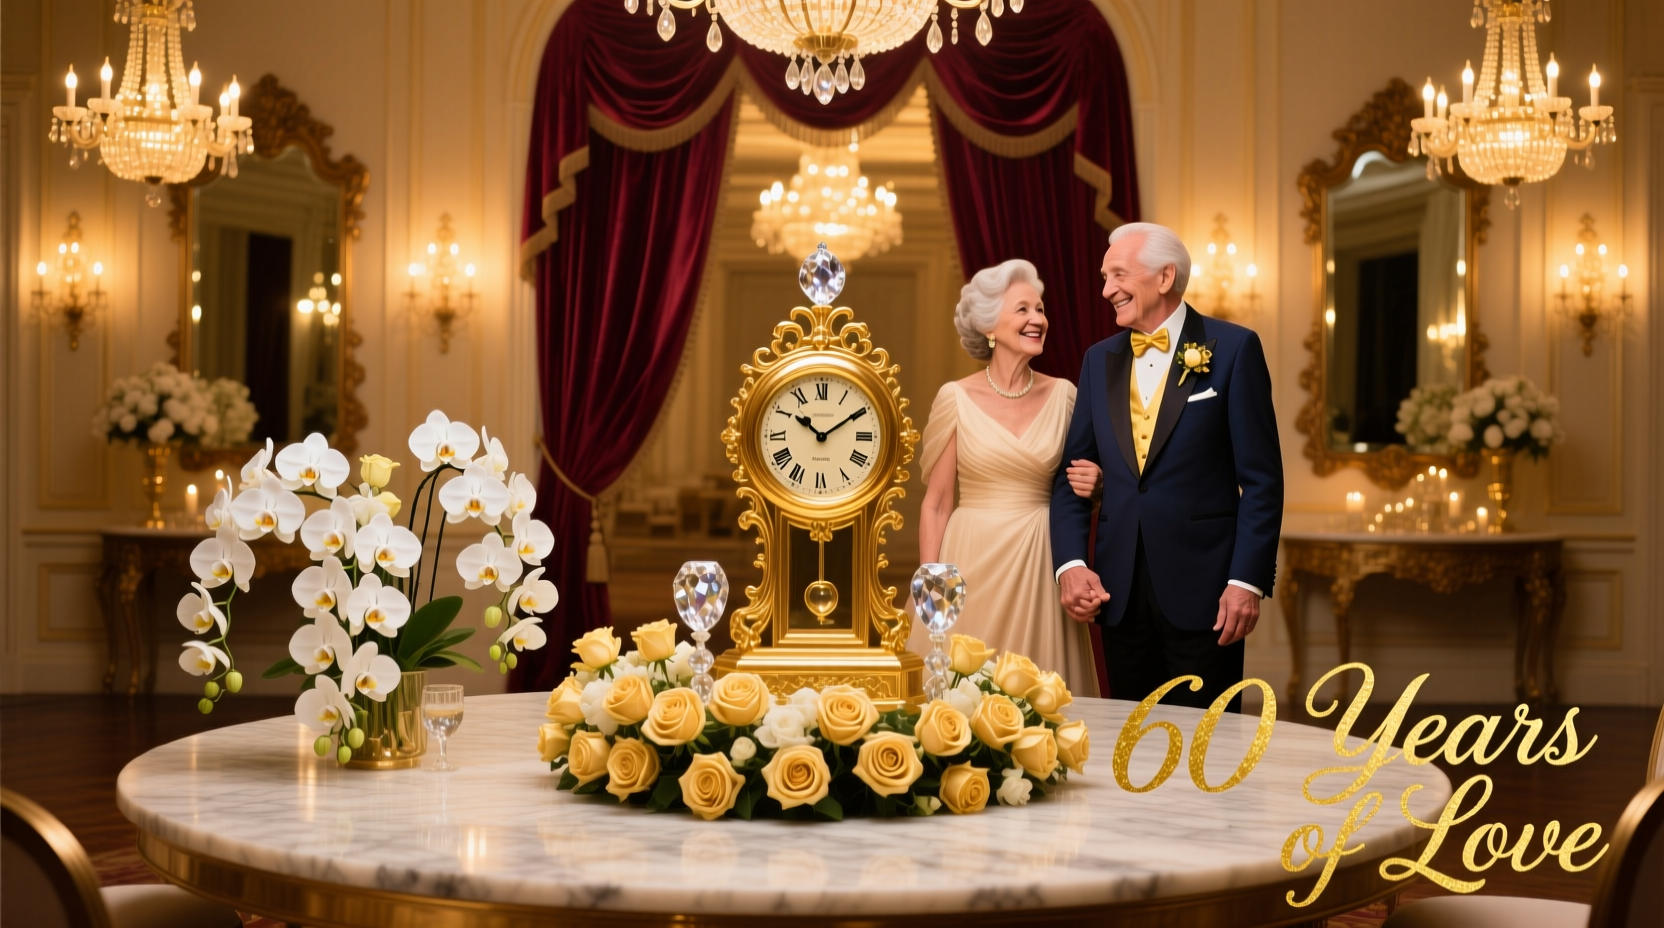 Diamond white, platinum shimmer, or icy silver? How couples are reimagining the 60th anniversary palette
 Peony-pink, seafoam, and burnt sienna: May wedding palettes that feel fresh—not fussy