How to Sew a Lace Overlay on a Wedding Dress: 5 Steps to a Flawless Finish
# How to Sew a Lace Overlay on a Wedding Dress: 5 Steps to a Flawless Finish
Adding a lace overlay to a wedding dress can transform a simple gown into something breathtaking — but one wrong cut or a puckered seam can ruin hours of work. Whether you're customizing a budget dress or restoring a vintage gown, this guide walks you through the process with the precision it deserves.
## Step 1: Choose the Right Lace Fabric
Not all lace is created equal. For overlays, **Chantilly lace** and **Alençon lace** are the gold standards. Chantilly is lightweight and drapes beautifully over satin or tulle, while Alençon features a corded edge that adds structure and a couture feel.
- **Stretch lace** works well for fitted bodices where the overlay needs to move with the body.
- **Re-embroidered lace** (lace with raised floral motifs) adds dimension but requires more careful placement to align patterns symmetrically.
- Buy at least 10–15% more yardage than your measurements suggest. Lace shifts during cutting and you'll need extra for pattern matching.
For a full-length overlay on a ball gown, budget for 5–8 yards depending on skirt circumference.
## Step 2: Prepare and Cut the Lace Correctly
This is where most DIYers make their first mistake. Lace must be cut along its natural scalloped edge wherever possible — never straight across a motif.
**Preparation checklist:**
1. Press the lace gently with a cool iron and a pressing cloth. Never apply direct heat.
2. Lay the lace flat on a large cutting surface and secure with pattern weights, not pins (pins distort the weave).
3. Trace your dress panels onto tissue paper first, then position the tissue over the lace to plan motif placement before cutting.
4. Use sharp fabric scissors or a rotary cutter. Dull blades cause fraying that's nearly impossible to fix on delicate lace.
If your lace has a repeat pattern, align the center motif at the bust or center front hem for a polished, intentional look.
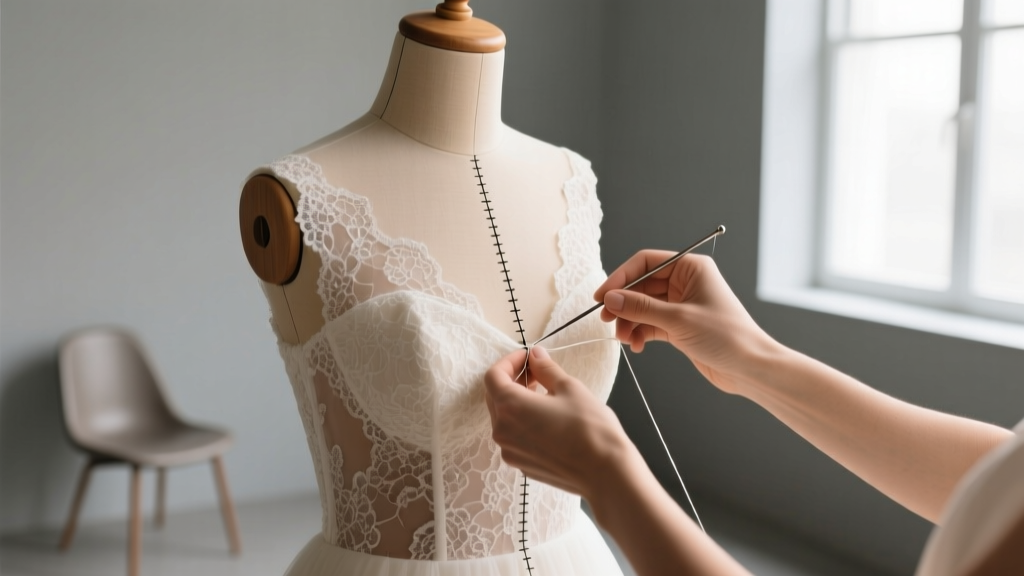
## Step 3: Attach the Overlay with the Right Technique
How you attach the lace depends on the base fabric and the look you want.
**Hand-basting first is non-negotiable.** Machine-sewing lace directly without basting causes it to slip and stretch unevenly. Use a long hand stitch to secure the overlay to the dress before any machine work.
**Stitching options:**
- **Invisible hand stitch (slip stitch):** Best for scalloped edges along hemlines and necklines. Catches only a thread or two of the base fabric for a seamless look.
- **Narrow zigzag stitch (machine):** Use a 1.5mm width on a sewing machine with a walking foot. This prevents the lace from tunneling or puckering.
- **Appliqué method:** For partial overlays or lace motifs, cut individual motifs and hand-stitch them directly onto the gown using a fine needle and matching thread.
Thread color matters: match the thread to the lace, not the base fabric. On ivory lace over white satin, use ivory thread throughout.
## Step 4: Finish Edges and Secure the Overlay
Raw lace edges fray quickly, especially after multiple fittings. Finish all cut edges before final attachment.
- Apply a thin line of **Fray Check** or fabric glue along any cut edge that won't be enclosed in a seam.
- For necklines and armholes, fold the lace edge under by 1/4 inch and slip-stitch it down, or use a narrow satin ribbon as a facing.
- At the hem, let the natural scalloped edge of the lace hang free — this is the most elegant finish and requires no additional hemming.
Once the overlay is fully attached, do a final fitting and check for any areas where the lace pulls or gaps. Small adjustments are far easier now than after the dress is steamed and pressed.
## Common Mistakes to Avoid
**Mistake 1: Assuming you can skip the hand-basting.**
Many sewers think a walking foot alone will keep lace in place. It won't. Lace has almost no grain stability, and even a slight shift mid-seam creates visible puckers. Basting takes 20 extra minutes and saves hours of ripping out stitches.
**Mistake 2: Cutting lace on the bias to save fabric.**
Bias-cut lace stretches unpredictably and rarely lies flat against a structured gown. Unless you're intentionally draping a cowl-neck overlay, always cut lace on the straight grain, following the direction of the pattern repeat.
## Final Thoughts
Sewing a lace overlay onto a wedding dress is one of the most rewarding alterations you can make — it adds elegance, coverage, and a custom feel that off-the-rack gowns rarely achieve. The key is patience: take your time with cutting, basting, and fitting before committing to any permanent stitches.
If you're working on a dress with sentimental value or a tight timeline, consider doing a full practice run on a muslin mock-up first. The techniques are the same, but the stakes are much lower.
**Ready to start?** Gather your materials, clear a large flat workspace, and take it one section at a time. Your finished gown will be worth every careful stitch. Should You Attend a Wedding You Don’t Support? 7 Uncomfortable Truths (and Exactly What to Say When You Decline With Grace)
Is it rude to not have a wedding registry? The truth no one tells you: why skipping it isn’t disrespectful — and how to communicate your choice with grace, confidence, and zero guilt
How to Wash Your Wedding Dress the Right Way: 7 Critical Steps You’re Probably Skipping (That Could Ruin $3,000 in Silk & Lace)
How Much Do Wedding Planners Make a Year? The Real Numbers Behind the Glamour—From $32K Side Hustles to $185K Full-Time Salaries (and What Actually Drives the Difference)
Did Justin Called Selena Before Wedding? The Truth Behind the Viral Rumor — What Texts, Calls, and Legal Docs Reveal (and Why It Still Matters in 2024)
Should You Attend a Wedding You Don’t Support? 7 Uncomfortable Truths (and Exactly What to Say When You Decline With Grace)
Is it rude to not have a wedding registry? The truth no one tells you: why skipping it isn’t disrespectful — and how to communicate your choice with grace, confidence, and zero guilt
How to Wash Your Wedding Dress the Right Way: 7 Critical Steps You’re Probably Skipping (That Could Ruin $3,000 in Silk & Lace)
How Much Do Wedding Planners Make a Year? The Real Numbers Behind the Glamour—From $32K Side Hustles to $185K Full-Time Salaries (and What Actually Drives the Difference)
Did Justin Called Selena Before Wedding? The Truth Behind the Viral Rumor — What Texts, Calls, and Legal Docs Reveal (and Why It Still Matters in 2024)
 Was Francia Raisa Invited to Selena Gomez Wedding? The Truth Behind the Rumors, Her Relationship Timeline with Selena, and Why This Question Keeps Trending on Social Media in 2024
Do You Celebrate Wedding Anniversary After Death of Spouse? 7 Compassionate, Evidence-Informed Answers That Honor Love Without Guilt or Pressure
Was Francia Raisa Invited to Selena Gomez Wedding? The Truth Behind the Rumors, Her Relationship Timeline with Selena, and Why This Question Keeps Trending on Social Media in 2024
Do You Celebrate Wedding Anniversary After Death of Spouse? 7 Compassionate, Evidence-Informed Answers That Honor Love Without Guilt or Pressure
 Are wedding bands cheaper than engagement rings? Yes—typically 40–70% less—but here’s exactly why (and when they’re *not*, plus how to spend smartly on both without overspending)
 How to Tell Wedding Guests No Gifts Without Feeling Awkward or Rude
Can you wear a white dress to a wedding? The truth no one tells you: It’s not about color—it’s about context, culture, timing, and who’s wearing white first—and here’s exactly how to decide without offending anyone.
How to Tell Wedding Guests No Gifts Without Feeling Awkward or Rude
Can you wear a white dress to a wedding? The truth no one tells you: It’s not about color—it’s about context, culture, timing, and who’s wearing white first—and here’s exactly how to decide without offending anyone.