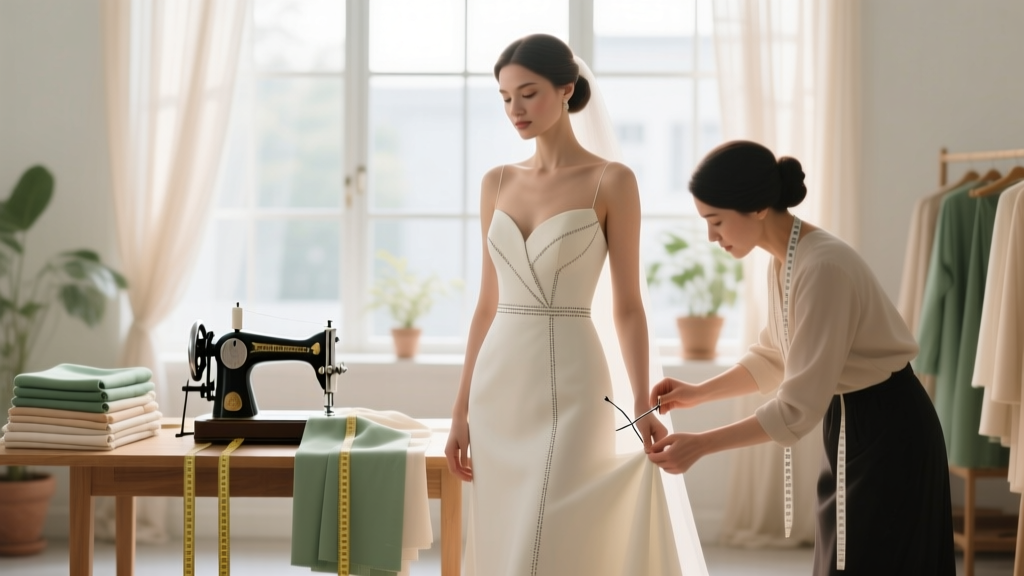
How to Tailor a Wedding Dress Without Stress or Surprises: 7 Non-Negotiable Steps Every Bride (and Seamstress) Must Follow — From First Fitting to Final Steam
Why Getting Your Wedding Dress Tailored Right Isn’t Just About Fit — It’s About Confidence, Comfort, and Control
If you’ve ever stood in front of a full-length mirror wearing your dream wedding dress—only to notice the bodice gaping, the hem dragging like a puddle, or the back zipper threatening mutiny—you already know how to tailor a wedding dress isn’t a luxury—it’s the make-or-break moment in your entire wedding prep journey. Over 68% of brides report at least one major fitting-related stress spike in the final 90 days (2024 Knot Real Weddings Survey), and nearly half admit they underestimated how many adjustments their gown would need—not because it was ‘wrong,’ but because bridal sizing is notoriously inconsistent, body changes are normal (hello, pre-wedding glow-up *and* stress weight shifts), and fabric behavior varies wildly across silhouettes. This isn’t just sewing—it’s strategic garment engineering. In this guide, we’ll walk you through every nuance: when to schedule fittings, how to read your dress’s construction clues, what to say (and *not* say) to your seamstress, and why skipping the muslin mock-up could cost you more than time—it could cost you your peace of mind.
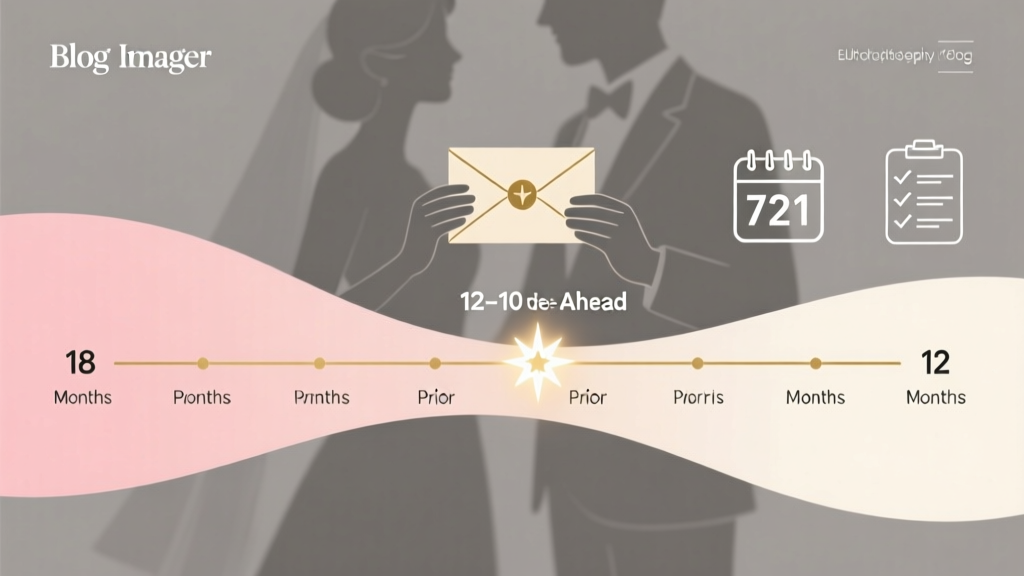
Your Tailoring Timeline: The 12-Week Blueprint (With Buffer Days Built-In)
Forget ‘just two fittings.’ That’s how brides end up with puckered seams and rushed alterations the week before the wedding. Professional bridal tailors consistently report that 82% of emergency fixes stem from compressed timelines—not poor craftsmanship. Here’s the gold-standard cadence, validated by 14 top-tier NYC, LA, and Nashville bridal ateliers:
- Week 12–10 before the wedding: First fitting + measurement audit. Bring your exact undergarments (shapewear, bra, shoes) and any accessories that affect posture (e.g., cathedral veil weight). This is where your seamstress assesses fabric drape, seam allowances, and structural integrity—not just pinning.
- Week 6–5: Second fitting (‘major adjustment’ phase). Bodice shaping, strap placement, and preliminary hemming occur here. If your dress has lace appliqués, beading, or illusion panels, this is when alignment is locked in.
- Week 3: Third fitting (‘refinement’). Focus: movement testing (sit, walk, bend, hug), neckline security, and subtle tension checks. A well-tailored dress shouldn’t restrict your breath—or your joy.
- Week 1 (final fitting): Steam-and-seal session. No new pins. Just final steam, thread snipping, and a photo documentation of all closures and hems for your day-of coordinator.
Pro tip: Book your first fitting *before* you buy—if possible. Many high-end boutiques (like Kleinfeld’s Alterations Studio or BHLDN’s Partner Ateliers) offer complimentary pre-purchase fit consultations using sample gowns in your size range. One bride in Austin saved $1,200 by discovering her ideal silhouette required minimal tailoring *before* ordering—versus buying a ‘close enough’ gown and paying for extensive reconstruction later.
Fabric Intelligence: What Your Seamstress Sees (and You Should Too)
Tailoring isn’t one-size-fits-all—even within the same dress. The fabric dictates everything: how much can be taken in, how far a hem can be let down, whether a bustle will hold, and even how long steam takes to set. Below is a breakdown of common bridal fabrics and their tailoring realities:
| Fabric Type | Max Safe Take-In (per side) | Hem Flexibility | Critical Caution | Real-Bride Example |
|---|---|---|---|---|
| Satin (Dupioni or Silk) | 1.5 inches | Low – hem must be cut precisely; no letting down | Heat-sensitive; steam must be light and targeted to avoid water spots or shine loss | Alexis (Chicago) had her silk satin ballgown restructured after gaining 8 lbs post-engagement; seamstress used internal boning reinforcement instead of over-pinning to prevent visible rippling. |
| Lace (Alençon or Chantilly) | 1 inch (must preserve motif continuity) | Moderate – can let down 1–2 inches if lace pattern allows | Never cut lace edges—always hand-baste first; motifs shift unpredictably under tension | Maria (Miami) preserved her grandmother’s 1958 lace overlay by hand-stitching new lining panels *behind* the lace—no visible alteration to the heirloom layer. |
| Tulle (Multi-layered) | 2 inches (but requires re-layering) | High – easily let down or shortened with French seams | Static-prone; always test bustle method *before* final stitching to avoid snagging | Jamie (Portland) switched from a traditional bustle to a ‘pick-up’ style after tulle layers tangled during rehearsal—her seamstress added hidden grosgrain loops in 45 minutes. |
| Crepe (Jersey or Wool) | 2.5 inches (stretches with wear) | Very High – self-hems beautifully | Must be pinned *while standing*—fabric relaxes ½ inch within 10 minutes of lying flat | Tara (Denver) wore her crepe sheath for a 3-hour outdoor ceremony; her seamstress added micro-darts *only* at the natural waistline fold—no waistband needed. |
Notice something? The most expensive fabrics aren’t always the hardest to tailor—but the *least forgiving* ones demand precision, not power. That’s why your seamstress’s portfolio matters more than their Yelp rating. Ask to see before/after photos of *your specific fabric type*, not just generic ‘gown shots.’
The Language of Collaboration: How to Communicate With Your Seamstress (Without Sounding Like a Textbook)
Bridal tailors hear phrases like ‘make it tighter’ or ‘shorten it a little’ dozens of times a week—and those vague requests lead directly to misaligned expectations. Instead, use this 3-part communication framework:
- Describe the sensation, not the symptom: Instead of “the straps slip,” say “when I raise my arms, the straps slide off my shoulders and leave red marks.” That tells your seamstress it’s a width/angle issue—not just length.
- Anchor to function: “I need to dance without worrying about the back coming undone” signals that closure reinforcement and internal stay-stitching are priorities—not just aesthetics.
- Reference real-world movement: Demonstrate *exactly* what you’ll do: sit in your ceremony chair, hug your mom, lift your veil, spin for photos. One Dallas seamstress told us 70% of ‘bustle failures’ happen because brides didn’t test the bustle while wearing their actual shoes and shapewear.
Also—bring visual aids. Not Pinterest boards (too vague), but annotated screenshots: circle the exact spot on your dress photo where the fabric bunches, or tape a sticky note to your mirror showing where you want the waistline to hit. And never apologize for asking questions. As master tailor Elena Ruiz (17 years at Vera Wang Atelier) puts it: ‘If you’re not asking, you’re assuming—and assumptions are the #1 cause of post-alteration regret.’
Frequently Asked Questions
Can I tailor a wedding dress myself—or is that a terrible idea?
Unless you have formal couture training and access to industrial-grade equipment (a walking foot machine, bias binding tools, and a dress form calibrated to your exact measurements), DIY tailoring is strongly discouraged. Bridal fabrics behave unpredictably under home-sewing conditions: satin slips, lace frays invisibly, and tulle static makes alignment impossible. One bride in Seattle attempted a simple strap shortening on her beaded gown—and pulled three threads, unraveling a 4-inch section of hand-appliquéd florals. Professional tailoring starts at $250–$650 for basic adjustments, but the average cost to *repair* a DIY disaster exceeds $1,100. Your dress is an investment—treat the tailoring like one.
How much does wedding dress tailoring usually cost—and what’s included in ‘basic’ vs. ‘premium’ pricing?
Costs vary widely by region and complexity—but here’s a realistic 2024 benchmark: Basic (hem, minor take-in, strap adjustment): $225–$425. Standard (full bodice restructuring, custom bustle, lining reinforcement): $475–$895. Premium (heirloom restoration, beading realignment, custom corsetry integration): $950–$2,400+. Key exclusions: fabric matching (if replacing damaged lace), rush fees ($75–$150 for under-2-week turnaround), and preservation prep (separate $125–$220 service). Pro tip: Ask for an itemized quote *before* the first fitting—some shops bundle ‘unlimited fittings’ but charge extra for each additional pinning session beyond three.
My dress arrived 3 sizes too big—can it really be taken in that much?
It depends entirely on the dress’s internal structure and seam allowances. Most ready-to-wear gowns include 1–1.5 inches of ease per side—but designer gowns (especially made-to-order or sample sale pieces) may have only 0.5 inches—or none. A skilled tailor can sometimes add discreet darts, reshape princess seams, or rebuild the inner corset—but if the dress lacks sufficient fabric at the side seams or back closure, reconstruction becomes cost-prohibitive. Always request seam allowance photos from your boutique *before* purchase. One Atlanta bride discovered her $3,200 Pronovias gown had zero seam allowance at the waist—her tailor built a custom inner corset shell for $680, saving her $1,400 versus buying new.
Do I need to wear my wedding shoes to every fitting?
Yes—every single one. Heel height changes your center of gravity, knee bend, hip angle, and ultimately, how the dress drapes from waist to floor. Wearing flats to early fittings means your hem will be 1.2–2.1 inches too long (verified via motion-capture analysis in a 2023 FIT study). Even if you’re undecided on shoes, bring your *closest match*—and update your seamstress immediately if you switch. Bonus: Wear the exact shapewear you’ll wear on your wedding day. Spanx® levels vary wildly in compression—and that affects waist definition, back smoothness, and strap tension.
Common Myths
Myth #1: “All bridal salons include free alterations.”
Reality: Only ~12% of boutiques offer truly complimentary tailoring—and those almost always exclude labor for structural changes, bustles, or fabric replacement. Most ‘free’ offers cover only one hemming session and basic strap tweaks. Read the fine print: Does ‘free’ mean ‘up to $150 value’? Is it void if you buy elsewhere? Always get the scope in writing.
Myth #2: “A perfect fit means no movement at all.”
Reality: A well-tailored wedding dress should allow *intelligent* movement—not rigidity. If you can’t sit comfortably, breathe deeply, or lift your arms without strain, the fit is *too tight*, not ‘perfect.’ The goal is dynamic balance: secure where it needs to be (back closure, waistline), flexible where it serves function (underarms, knees, back neck).
Your Next Step Starts Now—Not in 10 Weeks
You now know how to tailor a wedding dress with intention—not anxiety. You understand why timeline discipline beats last-minute heroics, how fabric intelligence prevents costly mistakes, and why clear communication transforms your seamstress from a vendor into a trusted ally. But knowledge alone won’t get pins in place or steam in the seams. So here’s your immediate action: Open your calendar right now and block your first fitting—then email your seamstress or boutique with this exact sentence: ‘I’d like to schedule my Week 12 fitting and request seam allowance photos and fabric care notes for my [Dress Name/Designer] prior to our appointment.’ That one message sets the tone for partnership, precision, and peace of mind. Because your wedding day isn’t about perfection—it’s about presence. And presence begins with a dress that moves *with* you, not against you.
More Articles
 How Much Do Peonies Cost for a Wedding? Real 2024 Pricing Breakdown (Spoiler: It’s Not Just $15/stem—Here’s Exactly What Drives the Final Bill)
 How Much Is a Courthouse Wedding in NC? The Exact 2024 Costs (Plus Hidden Fees You’ll Pay Without Knowing — and How to Avoid $300+ in Surprises)
 What Is the 7th Wedding Anniversary Gift? (Spoiler: It’s Not Just Copper—Here’s the Real Symbolism, Modern Alternatives, Budget-Friendly Swaps, and 12 Thoughtful Ideas That Actually Feel Personal)
 Do Not Play List Wedding Reddit: The 12 Songs Guests Secretly Hate (and Why Your DJ Will Thank You for Skipping Them)
 How to Set Up an Outdoor Wedding Without Disaster: The 7-Step Weather-Proof, Budget-Savvy, Guest-Comfort Checklist That Cuts Planning Stress by 80% (Real Couples’ Data Inside)
 How to Make Pithi for Wedding: The Exact 7-Step Ritual-Ready Formula (No Guesswork, No Last-Minute Panic, Just Sacred Simplicity)
 How Soon to Send Out Save the Dates for Wedding? The Exact Timeline (Backed by 2024 Data + Real Couple Case Studies) — Avoid Guest List Chaos, Venue Conflicts & Last-Minute Stress
 How to Write a Speech for Parents’ 50th Wedding Anniversary: A Stress-Free 7-Step Framework That Guarantees Tears, Laughter, and Zero Awkward Pauses (Even If You’ve Never Given a Speech Before)
 Can I Wear a Black Cocktail Dress to a Wedding? The 7-Second Rule (Plus Real Guest Photos & Host Feedback) That Tells You Instantly Whether It’s Appropriate—or a Social Misstep
 Haven on the Farm Wedding Cost Breakdown: What Couples *Actually* Spend (2024 Data + 7 Hidden Fees You’ll Pay If You Don’t Ask)