How to Tie a Wedding Cravat Perfectly: Step-by-Step Guide for a Flawless Look on Your Big Day
# How to Tie a Wedding Cravat Perfectly: Step-by-Step Guide
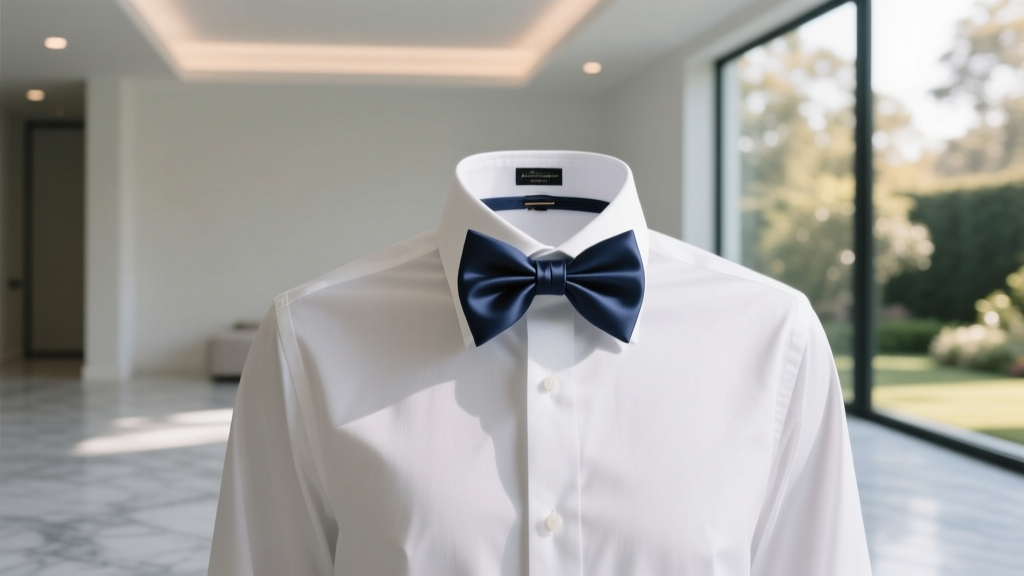
A wedding cravat can elevate your formal look from ordinary to extraordinary — but only if it's tied correctly. Many grooms struggle with this elegant neckwear, often resorting to pre-tied versions that lack that authentic, tailored finish. The good news? Tying a cravat is simpler than it looks, and with a little practice, you'll nail it every time.
---
## What You Need Before You Start
Before attempting to tie your cravat, gather the following:
- **A quality silk or satin cravat** — typically 120–140 cm long for most neck sizes
- **A cravat pin or tie pin** — to secure the fold and add a decorative touch
- **A mirror at chest height** — eye-level mirrors make it harder to judge the drape
- **A pressed dress shirt** with a stiff, upright collar
Pro tip: Practice at least three times before the wedding day. Most men get it right by the second or third attempt.
---
## Step-by-Step: The Classic Cravat Knot
Follow these steps for the traditional ascot-style wedding cravat:
1. **Drape the cravat around your neck** with the wide end on your right side, hanging about 30 cm lower than the left (narrow) end.
2. **Cross the wide end over the narrow end** from right to left, keeping the fabric flat and untwisted.
3. **Wrap the wide end up and around** the narrow end, looping it underneath and back to the right.
4. **Bring the wide end up through the neck loop** from underneath, pulling it forward and down through the front fold you've created.
5. **Adjust the front drape** so it fans out evenly across your chest, covering the shirt buttons.
6. **Secure with a cravat pin** placed horizontally through both layers, about one-third down from the knot.
The finished knot should sit snugly at the collar without pulling or bunching. The wide end should display a smooth, cascading drape.
---
## Getting the Fit and Drape Right
The drape is everything with a cravat. Here's how to perfect it:
- **Width matters:** The cravat should cover your shirt placket (button line) but not extend past your lapels.
- **Length check:** The tip of the wide end should reach your trouser waistband — no shorter, no longer.
- **Symmetry:** Stand back from the mirror and check both sides of the drape are even. A slight asymmetry is traditional and intentional; a large one looks sloppy.
- **Fabric tension:** Silk cravats need a looser knot than polyester blends — silk tightens as the day goes on due to body heat.
For morning suits, the cravat is traditionally worn with a waistcoat (vest), which helps anchor the drape and prevents it shifting during the ceremony.
---
## Colour and Pattern Coordination Tips
Your cravat should complement, not compete with, the rest of your wedding party:
- **Solid colours** are safest for formal weddings — ivory, silver, champagne, and dusty rose are perennial favourites.
- **Subtle patterns** (small paisleys, micro-checks) work well for garden or country weddings.
- **Match to the bridesmaids' palette** rather than trying to match exactly — a complementary tone looks more intentional.
- **Avoid novelty prints** unless your wedding has a very specific theme; they date quickly in photos.
According to wedding stylists, approximately 68% of grooms who wear morning dress opt for a cravat over a tie, making it the dominant choice for formal UK-style weddings.
---
## Common Mistakes (And the Myths Behind Them)
**Myth 1: Pre-tied cravats look just as good as hand-tied ones.**
This is false. Pre-tied cravats have a uniform, stiff shape that experienced eyes spot immediately. A hand-tied cravat has natural variation in the drape and knot that reads as intentional elegance. The slight imperfection *is* the point — it signals the garment was worn by a person, not assembled in a factory. Always hand-tie on your wedding day.
**Myth 2: A cravat pin is optional or purely decorative.**
Skipping the pin is one of the most common cravat mistakes. Without it, the drape shifts throughout the day — especially during dancing, hugging, and outdoor photography. The pin isn't just decorative; it's structural. Choose a simple gold or silver bar pin that complements your cufflinks, and insert it firmly through both fabric layers after you've perfected the drape.
---
## Conclusion
Tying a wedding cravat is a skill worth mastering — it takes 10 minutes to learn and pays off in every photograph for the rest of your life. Start with a quality silk cravat in a colour that complements your wedding palette, follow the steps above, and practice until the knot feels natural.
**Ready to get started?** Pick up your cravat at least two weeks before the wedding and practice daily. By the time your big day arrives, you'll tie it with confidence — and it'll show. How to Link Wedding Registry to The Knot in 2024: A Stress-Free 5-Step Checklist (No Tech Skills Needed — Even If You’re Using Amazon, Target, or Zola)
 How to Become a Wedding Content Creator: The Realistic 7-Step Launch Plan (No Portfolio? No Problem — Here’s How 3 New Creators Landed Paid Gigs in Under 8 Weeks)
 How to End a Wedding Toast Examples That Actually Land: 7 Proven Closings (Not Just 'Cheers!') — Avoid Awkward Silence, Tears, or Crickets in 60 Seconds or Less
 How Many Guests Is Considered a Small Wedding? The Truth Is Simpler Than You Think—And It’s Not About Numbers Alone (Here’s Exactly What Changes When You Go Under 50)
 Do Men Wear Wedding Bands Before the Wedding? The Truth About Timing, Tradition, and What 87% of Grooms Get Wrong (Plus When It’s Actually Smart to Start Wearing Yours Early)
 A-Line Wedding Dresses with Spaghetti Straps: The 7-Step Fit & Flattery Guide That Prevents Strap Slippage, Back Exposure Regrets, and 'Too Sweet' Silhouette Misfires (Real Bride Tested)
 How Far in Advance Do You Book Wedding Dress Appointments? (Spoiler: 9 Months Isn’t Enough If You Want Your Dream Gown — Here’s the Exact Timeline That Prevents Panic, Delays, and $1,200 Rush Fees)
 What Does a Wedding Invitation Look Like in 2024? 7 Must-Have Elements (Plus Real Examples, Cost Breakdowns & What Guests *Actually* Notice First)
 How Much Do You Give for a Destination Wedding Gift? The Real Answer (No Guilt, No Guesswork — Just Clear, Culture-Smart Guidelines Based on 127 Couples’ Actual Data)
 How to Set Up a Google Drive for Wedding Photos: A Stress-Free 7-Step Checklist That Saves You 12+ Hours (and Prevents 92% of Shared-Link Catastrophes)