Build Your Own Wedding Arbor and Save Hundreds of Dollars
## You Don't Need to Spend $500 on a Wedding Arbor
The average rental cost for a wedding arbor runs $200–$600. But with a free weekend, $50–$150 in materials, and zero carpentry experience, you can build one that looks just as stunning — and keep it forever. Whether you're planning a backyard ceremony or a rustic barn wedding, a do it yourself wedding arbor is one of the highest-impact, lowest-cost projects you can tackle before the big day.
---
## Choosing the Right Style for Your Venue
Before buying a single board, match your arbor design to your setting:
- **Simple A-frame arch**: Two angled posts joined at the top. Best for outdoor lawns. Requires 4 lumber pieces and basic screws.
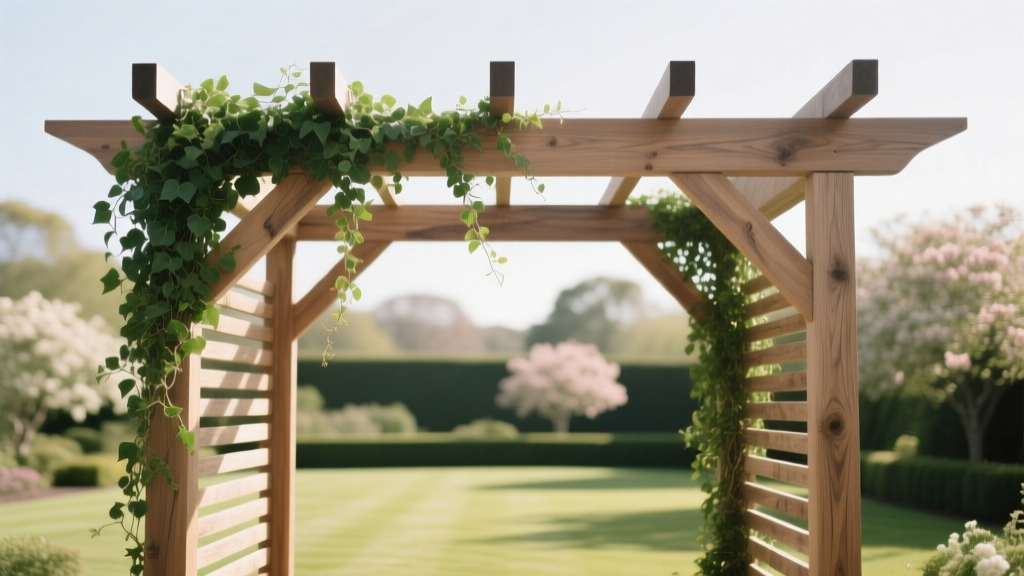
- **Square pergola-style**: Four posts with a flat top grid. Ideal for draping fabric or greenery. More stable for windy locations.
- **Rustic branch arch**: Forage or buy curved branches, lash together with twine. Zero cutting required — perfect for woodland or boho themes.
- **PVC pipe arch**: Lightweight, portable, and under $30. Excellent for beach or destination weddings where transport matters.
Measure your ceremony space first. A standard arbor is 7–8 feet tall and 4–5 feet wide — wide enough for two people to stand comfortably beneath it.
---
## Materials and Tools You Actually Need
For a classic wooden A-frame do it yourself wedding arbor:
**Materials** (approx. $60–$120):
- 4× cedar or pine 2×4s, 8 feet long
- 2× 1×4 crossbeams, 5 feet long
- Wood screws (2.5 inch)
- Sandpaper (120 grit)
- Exterior wood stain or white paint
- Zip ties or floral wire (for decorating)
**Tools**:
- Drill
- Saw (or ask the hardware store to cut for you — most do it free)
- Measuring tape
- Level
**Assembly steps**:
1. Cut two pairs of posts at a slight angle at the top so they meet in a peak.
2. Screw the crossbeam between each pair of posts at the 6-foot mark.
3. Join the two A-frames with a horizontal beam across the top.
4. Sand all surfaces, then stain or paint.
5. Let dry 24 hours before decorating.
Total build time: 3–4 hours. No advanced skills needed.
---
## Decorating Your DIY Wedding Arbor
The structure is just the canvas. Decoration is where your arbor becomes memorable:
- **Greenery**: Eucalyptus, ferns, and ivy are inexpensive and drape naturally. Buy from a wholesale florist or Trader Joe's the day before.
- **Fabric draping**: Chiffon or tulle in 10-yard cuts costs $10–$20. Wrap loosely around posts and let it flow.
- **Dried pampas grass**: Wildly popular, long-lasting, and budget-friendly. Bundles from Amazon or craft stores run $15–$25.
- **Fairy lights**: Wrap warm white LED string lights through the frame for an evening ceremony glow.
- **Fresh flowers**: Attach small floral clusters with floral wire at the peak and lower corners. You don't need full coverage — strategic placement reads beautifully in photos.
Pro tip: assemble and decorate the arbor the evening before, then transport it assembled if possible. Reassembling on-site under time pressure is stressful.
---
## Common Myths About DIY Wedding Arbors
**Myth 1: "It will look homemade and cheap."**
Not if you finish it properly. Sanding, a clean coat of paint or stain, and intentional decoration make a $80 arbor indistinguishable from a $500 rental in photos. The key is clean lines and cohesive color — not expensive materials.
**Myth 2: "It's too complicated without woodworking experience."**
A basic A-frame arbor is four posts and two crossbeams. If you can drill a screw, you can build one. Hardware stores will cut lumber to your measurements. The PVC version requires no tools at all — just connectors and pipe sections that press together.
---
## Your Next Step
A do it yourself wedding arbor is one of the smartest investments you can make for your ceremony: low cost, high visual impact, and something you can repurpose in your garden afterward. Start by choosing your style based on venue and transport needs, then price out materials at your local hardware store this week.
Sketch your design, confirm your measurements, and give yourself at least two weekends — one to build, one to decorate and troubleshoot. Your ceremony backdrop will be exactly what you envisioned, at a fraction of the rental price. Do French Wear Wedding Rings? The Truth Behind France’s Quiet Tradition — Why You’ll Rarely See Them on Left Hands (And What They *Actually* Wear Instead)
How Much Was The Situation’s Wedding? Breaking Down Vinny Guadagnino’s $1.2M+ Staten Island Spectacle — What Every Couple Can Learn (Without Spending a Dime on a 'Jersey Shore' Budget)
What Is a Toast at a Wedding? (And Why 73% of Guests Remember the Toast More Than the First Dance — Here’s How to Nail Yours Without Sweating)
Do French Wear Wedding Rings? The Truth Behind France’s Quiet Tradition — Why You’ll Rarely See Them on Left Hands (And What They *Actually* Wear Instead)
How Much Was The Situation’s Wedding? Breaking Down Vinny Guadagnino’s $1.2M+ Staten Island Spectacle — What Every Couple Can Learn (Without Spending a Dime on a 'Jersey Shore' Budget)
What Is a Toast at a Wedding? (And Why 73% of Guests Remember the Toast More Than the First Dance — Here’s How to Nail Yours Without Sweating)
 How Do You Wish Someone a Happy Wedding Anniversary? 7 Unexpectedly Powerful Ways (Backed by Psychology & Real Couples’ Stories) That Go Way Beyond ‘Congrats!’
What Does Throwing Rice at a Wedding Mean? The Surprising Truth Behind This Ancient Tradition (And Why Most Couples Skip It Today)
How to Draw Wedding Rings in 7 Minutes Flat: A Foolproof, No-Experience-Necessary Guide for Artists, Teachers & DIY Couples (Even If You’ve Never Held a Pencil Right)
How Do You Wish Someone a Happy Wedding Anniversary? 7 Unexpectedly Powerful Ways (Backed by Psychology & Real Couples’ Stories) That Go Way Beyond ‘Congrats!’
What Does Throwing Rice at a Wedding Mean? The Surprising Truth Behind This Ancient Tradition (And Why Most Couples Skip It Today)
How to Draw Wedding Rings in 7 Minutes Flat: A Foolproof, No-Experience-Necessary Guide for Artists, Teachers & DIY Couples (Even If You’ve Never Held a Pencil Right)
 Should You Invite Your Boss to Your Wedding? The Uncomfortable Truth Most Couples Ignore (and What 87% of HR Managers Say You’re Getting Wrong)
 Is It Okay to Leave a Wedding Reception Early? The Real Etiquette Rules (Not the Myths) — Plus Exactly When, How, and Why You *Should* Slip Away Gracefully Without Guilt
 How to Wrap a Wedding Bouquet Handle Perfectly in 5 Simple Steps
 How to Beat Post Wedding Blues: 7 Science-Backed Strategies That Actually Work (Not Just 'Get Over It' Advice)