How to Plan a Wedding With a Photo Slideshow
There’s a moment at so many weddings when the room gets quiet for just a second—then someone laughs, someone tears up, and suddenly everyone feels connected. A well-planned photo slideshow can create that moment. It’s not just “pictures on a screen.” It’s a story: how you grew up, how you found each other, who helped shape you, and what you’re celebrating with the people in front of you.
If you’re juggling a guest list, a budget, and a thousand tiny decisions, adding a slideshow can feel like one more project. The good news: with the right timeline and a simple plan, a wedding photo slideshow can be one of the easiest ways to add meaning without adding stress.
This guide walks you through exactly how to plan a wedding with a photo slideshow—where it fits best in your day, what photos to include, how to avoid awkward pacing, and how to keep it technically smooth (even if you’re not “tech people”).
Why a Photo Slideshow Works So Well at Weddings
A slideshow is one of the few wedding elements that speaks to every generation in the room. It gives your guests something personal to connect with—even if they’re meeting your college friends for the first time.
- It builds emotional momentum: perfect before toasts, the first dance, or dinner.
- It bridges families and friend groups: guests learn names and faces through photos.
- It fills “in-between” time: cocktail hour, dinner service, or a room flip becomes more enjoyable.
- It becomes a keepsake: you’ll rewatch it on anniversaries.
Decide the Slideshow Style: Sweet, Funny, or Documentary?
Before you gather a single photo, choose the tone. This keeps you from spending hours pulling images that don’t fit together.
Popular slideshow themes couples love
- “From Then to Now”: childhood, teen years, early adulthood, dating, engagement.
- “Two Stories, One Home”: alternate between each partner’s photos until you meet in the middle.
- “Our People”: highlight friendships, siblings, grandparents, chosen family, and group trips.
- “A Love Letter”: fewer photos, slower pacing, romantic music, short captions.
- “Roast (but make it classy)”: light humor, but nothing embarrassing or inside-joke heavy.
Real-world scenario: If you’re hosting a blended-family wedding, “Two Stories, One Home” can be especially meaningful. You can include family photos from both sides, then transition into shared memories to emphasize unity.
Where the Slideshow Fits Best in Your Wedding Timeline
Placement matters. The same slideshow can feel magical at one time and distracting at another.
Best moments to show a wedding slideshow
- Cocktail hour: Guests are milling around, and a looped slideshow gives them something to enjoy without demanding attention.
- Dinner (between courses): Keep it short and lightly entertaining.
- Right before speeches: A sweet slideshow can set the tone for heartfelt toasts.
- Rehearsal dinner or welcome party: Great for longer slideshows or more “family history” content.
- Next-day brunch: Fun for candid photos from your first day together as a married couple (if someone is uploading them quickly).
Timing guidelines (so it doesn’t drag)
- Ideal length: 3–6 minutes for the wedding day
- Absolute max: 8–10 minutes (only if it’s truly captivating)
- Photo count rule of thumb: 45–90 photos total, depending on pacing
Pro planner tip: If your venue has multiple rooms, place the slideshow where guests naturally gather (bar area, lounge, or near escort cards). If it’s meant to be watched as a “moment,” schedule it and have your MC or DJ announce it.
Step-by-Step: How to Create a Wedding Photo Slideshow Without Stress
Step 1: Set your deadline (and work backward)
A slideshow always takes longer than couples expect—mostly because photo hunting is emotional and distracting (in the best way). Use this timeline:
- 8–10 weeks out: Decide theme, length, and who’s responsible
- 6–8 weeks out: Gather photos from family and friends
- 4–6 weeks out: Build first draft; choose music
- 3–4 weeks out: Revise, trim, add captions; test playback
- 2 weeks out: Final export; share with DJ/venue; backup files
- Wedding week: Final technical run-through if possible
Step 2: Assign roles (so it doesn’t become a last-minute scramble)
Decide who does what early. A simple split:
- Partner A: collects photos from their side + selects music
- Partner B: collects photos from their side + drafts captions
- Trusted friend/sibling: reviews for pacing and “guest-friendly” content
- DJ/MC: cues playback at the right moment
Step 3: Gather photos efficiently (without chasing everyone individually)
Make it easy for loved ones to contribute:
- Create a shared folder (Google Drive, Dropbox, iCloud link)
- Text/email one clear request with a deadline
- Ask for 10–20 favorites per person rather than “anything you have”
Message template you can copy:
“Hi! We’re making a short wedding slideshow and would love a few photos of us (or of me/Partner) that you adore. Could you upload 10–15 favorites by Sunday? Candid is perfect. Thank you!”
Step 4: Curate the story (the secret to a slideshow guests actually watch)
Your goal isn’t to include every memory—it’s to tell a clean, relatable story.
- Start with quick context: a few childhood shots for each partner
- Build connection: teen/college photos, early adulthood, family moments
- Bring in your relationship: first trip, everyday life, milestones
- End with “now”: engagement, recent favorites, a closing message
Guest-friendly balance: Aim for about 30–40% couple photos, 30% family, 30–40% friends and shared experiences. If your crowd is mostly friends (destination wedding, smaller family), flip that ratio.
Step 5: Choose music that fits the room
Music sets the emotional temperature. Think about your audience and the time of day.
- For cocktail hour: upbeat, light, instrumental or acoustic covers
- For dinner: warm, mid-tempo, lyrics that won’t compete with conversation
- For a featured moment: one meaningful song with a clear build
Budget note: Most couples use commercially released music without issues at private weddings, but venues and videographers may have their own policies. If you’re posting the slideshow online, consider royalty-free music to avoid takedowns.
Step 6: Add captions sparingly (and make them readable)
Captions can be sweet, but too much text slows everything down.
- Keep captions to 3–7 words when possible
- Use high-contrast text (white with subtle shadow, or dark overlay)
- Skip inside jokes unless they’re universally understood
Caption ideas: “First road trip,” “Grandma’s kitchen,” “The day we met,” “Our favorite place,” “Engaged!”
Step 7: Export, test, and back it up (twice)
Most slideshow mishaps happen because nobody tested the file on the actual equipment.
- Export in 1080p (Full HD) for reliable playback
- Save as MP4 (most universally compatible)
- Test on:
- your laptop
- the venue’s screen/projector (if possible)
- the DJ’s system or playback device
- Bring backups:
- USB drive
- cloud link
- a second device (laptop or tablet)
Budget Considerations: What a Wedding Slideshow Really Costs
A photo slideshow can be nearly free—or it can become a mini production. Here’s a realistic range to help you plan.
- DIY (free–$100): use a simple slideshow tool, your own laptop, venue TV
- Upgraded DIY ($150–$600): rental projector/screen, HDMI adapters, clicker, audio cable
- DJ add-on ($100–$400): DJ handles playback and coordination
- Professional edit ($300–$1,200+): editor creates a polished slideshow with transitions, color correction, music syncing
Where to spend (if you’re choosing): reliable equipment and someone responsible for cueing it. Guests will forgive simple transitions; they won’t forget a slideshow that won’t load.
Real-World Slideshow Plans (Examples You Can Copy)
Example 1: The “Cocktail Hour Loop”
- Length: 6 minutes looped
- Content: travel photos, family candids, wedding party shots
- Why it works: guests can watch pieces while they mingle
- Pro tip: avoid heavy emotional music—keep it bright and social
Example 2: The “Before Toasts” Feature Moment
- Length: 4 minutes
- Content: childhood-to-engagement storyline, 60–70 photos
- Why it works: it focuses the room and sets a heartfelt tone
- Pro tip: have the DJ lower dinner music, announce it, and dim lights slightly
Example 3: The “Rehearsal Dinner Deep Cut”
- Length: 10–15 minutes
- Content: more family history, grandparents, old photos, longer captions
- Why it works: rehearsal dinners are smaller and more intimate
- Pro tip: ask parents for photos early—scanning takes time
Common Mistakes to Avoid (and What Planners Recommend Instead)
- Mistake: Making it too long.
Do instead: Keep it under 6 minutes for the wedding day. If you have more, loop it during cocktail hour or show the extended version at the rehearsal dinner. - Mistake: Inside jokes guests won’t understand.
Do instead: Choose images that tell a universal story—family, friendship, milestones, everyday joy. - Mistake: Embarrassing photos (especially of exes, messy parties, or unflattering shots).
Do instead: Use the “grandparent test.” If you’d feel weird watching it with your grandma, skip it. - Mistake: Relying on venue Wi-Fi to stream it.
Do instead: Download the final MP4 and play it locally from a device. - Mistake: Forgetting audio logistics.
Do instead: Confirm where sound comes from (DJ speakers, venue system, projector speaker) and test volume in the room.
Wedding Planner Pro Tips for a Smooth Slideshow Moment
- Build in a “buffer”: Tell your DJ to have the slideshow ready 10 minutes before the planned time.
- Place it strategically: Don’t schedule it during food delivery, table visits, or sunset photos.
- Keep transitions clean: Simple fades look timeless; flashy effects can feel dated fast.
- Include a tribute slide thoughtfully: If honoring a loved one who passed, place it near the end, keep wording simple, and choose a warm photo. Ask close family if they’re comfortable with it.
- Do one final “content scan”: Check for accidental duplicates, misspellings, and any photo that could be misread by guests.
Photo Slideshow Checklist (Quick Planning Summary)
- Choose slideshow purpose: looped ambiance or featured moment
- Decide length (3–6 minutes recommended)
- Pick a theme and rough outline
- Create a shared folder and request photos (with a deadline)
- Select and sequence photos (aim for 45–90 total)
- Choose music (consider venue policies and posting plans)
- Add minimal captions (readable and guest-friendly)
- Export as MP4, 1080p
- Test on the actual playback setup
- Bring two backups (USB + cloud link or second device)
- Assign a “slideshow captain” (DJ/MC/friend) for cueing
FAQ: Wedding Photo Slideshows
How many photos should be in a wedding slideshow?
For a 3–6 minute slideshow, plan for about 45–90 photos. Faster pacing works well for cocktail hour; slower pacing fits a more emotional featured moment.
Should we show the slideshow at the reception or rehearsal dinner?
If your slideshow is short and high-energy, the reception is perfect. If it’s longer, includes extended family history, or you want a more intimate reaction, the rehearsal dinner is often the better fit.
Do we need a projector and screen?
Not always. Many venues have TVs or built-in displays. For larger ballrooms, a projector and screen (or LED wall) can make a big difference. Ask your venue what’s included before renting anything.
Who should run the slideshow during the wedding?
Your DJ or MC is the best choice because they’re already managing the timeline and sound. If you’re doing it DIY, assign one tech-comfortable friend and give them clear instructions and backups.
Can we include photos of guests who aren’t attending?
Yes—especially if it’s a tribute or a meaningful friendship. Just keep it balanced so guests in the room still feel included, and avoid anything that could create awkward questions.
What’s the safest file format to use?
MP4 (H.264) in 1080p is the most universally compatible for DJs, TVs, and projectors. Save it locally on a device and bring a USB backup.
Your Next Steps
Choose where the slideshow fits in your wedding timeline, decide your theme, and set a firm deadline so you’re not editing photos the week of your wedding. Then gather images with a shared folder, keep the final cut short, and test playback early. When it’s done well, your slideshow becomes one of those signature wedding moments people talk about long after the dance floor closes.
For more supportive, practical planning help—timelines, reception ideas, ceremony details, and budget-friendly tips—browse more wedding planning guides on weddingsift.com.
More Articles
 How to Plan a Wedding That Fits Your Personality
 Wedding Day Hair and Makeup Timeline Planning
 Wedding Planning How to Choose the Right Lighting
 How to Hire a Wedding Coordinator vs DIY Planning
 How to Plan a Wedding With a Welcome Reception
 Seashell place cards, compostable menus, and vows whispered over tide pools—intimacy meets intention on the coast
 How to Plan a Wedding With a Welcome Sign That Wows
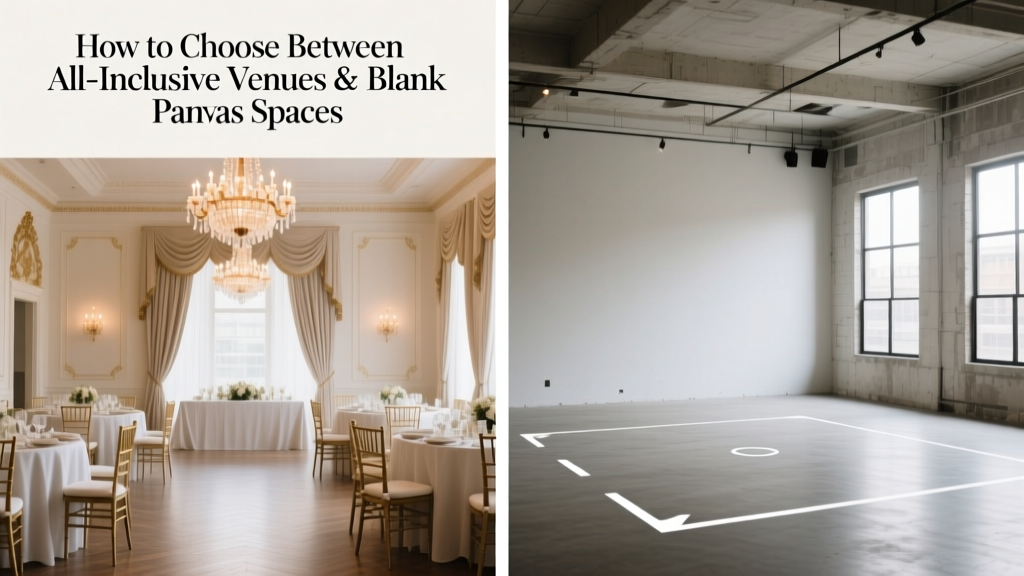 How to Choose Between All-Inclusive Venues and Blank Canvas Spaces
 How to Plan a Wedding With a Live Streaming Option
 Wedding Planning for Military Couples Special Considerations