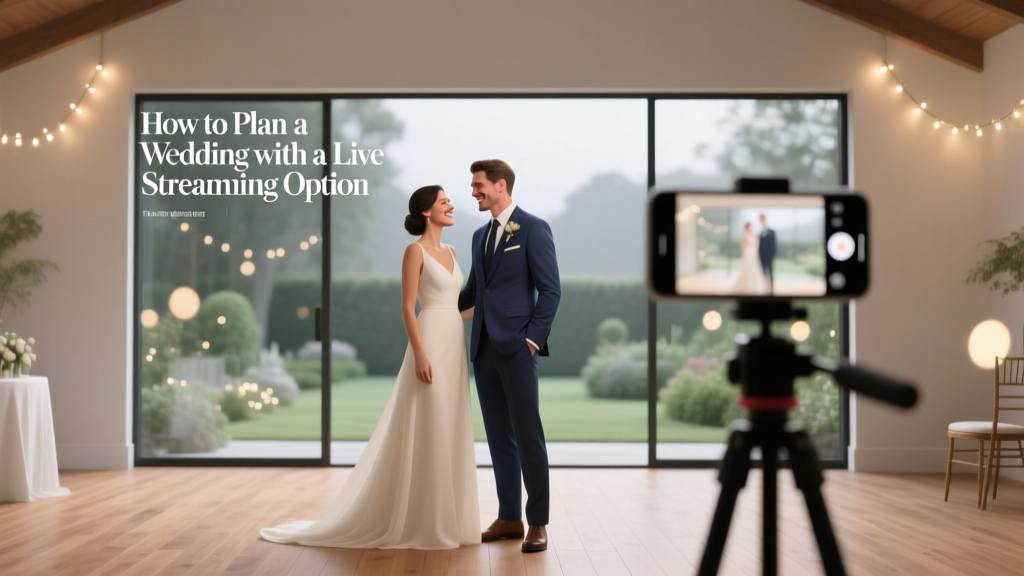
How to Plan a Wedding With a Live Streaming Option
You’ve probably pictured your wedding day a thousand times—walking down the aisle, seeing your partner’s face, hugging your favorite people, and feeling that rush of “this is really happening.” Then reality taps you on the shoulder: not everyone you love can be there in person. Maybe it’s a grandparent who shouldn’t travel, a sibling deployed overseas, friends with new babies, or loved ones facing visa issues or tight budgets.
A live streaming wedding option is a beautiful way to bridge that gap. When it’s done well, it doesn’t feel like a “second-best” backup—it feels like a thoughtful extension of your celebration. Your in-person guests still get the full experience, and your virtual guests feel genuinely included rather than like spectators.
This guide walks you through the planning details—tech, timeline, etiquette, and budget—so your wedding live stream feels polished, easy, and warmly personal.
Step 1: Decide What You’re Streaming (and Who It’s For)
Before you price equipment or pick a platform, get clear on your goals. This one decision will shape everything else: the complexity, the budget, and the level of support you’ll need.
Choose your streaming coverage
- Ceremony-only: Most common, simplest, and often the most meaningful for remote guests.
- Ceremony + speeches: Great if you have a small guest list and a tight timeline.
- Full event coverage: Typically requires a professional team, multiple cameras, and careful audio planning.
Identify your virtual guest list
Make a quick list of who needs the live stream and why. Real-world scenarios couples plan around:
- Grandparents who can’t travel but want to watch in real time.
- A best friend living abroad who can’t get time off work.
- Family members with health concerns who prefer to avoid crowds.
- Guests who weren’t invited due to venue capacity but you still want to include in a limited way.
Set expectations early
Decide whether you’re offering:
- Live-only access (no replay)
- Live + recording (private link afterward)
- Recording only (helpful for time zones)
Step 2: Build a Streaming Budget (With Realistic Ranges)
Wedding live streaming can be free-ish or fully produced. Your budget depends on how “broadcast-level” you want it to feel.
Common cost ranges
- DIY basic: $0–$200 (phone tripod, extra battery, basic mic)
- DIY upgraded: $200–$800 (better microphones, dedicated hotspot, stabilizer, streaming app subscription)
- Professional single-camera: $800–$2,500 (operator, audio capture, stable encoding)
- Professional multi-camera: $2,500–$6,000+ (two to four cameras, switching, pro audio, recording, sometimes graphics)
Budget line items couples forget
- Audio gear: Clear vows matter more than a beautiful wide shot.
- Internet solution: Venue Wi-Fi isn’t always reliable.
- Platform fees: Some services charge for guest capacity or recording storage.
- Power: Extension cords, power strips, spare batteries.
- Help: Paying a tech-savvy friend to manage the stream (so your wedding party doesn’t have to).
Money-saving tip
If you’re choosing between extra camera angles and professional audio, pick audio. Remote guests will forgive a simple view. They won’t stay on the stream if they can’t hear your vows.
Step 3: Pick the Right Platform (Private, Easy, and Guest-Friendly)
The best streaming platform is the one your guests can access without stress. Aim for a simple link and minimal logins.
Popular wedding live stream options
- Unlisted YouTube Live: Easy to access, works on TVs, good stability. Keep it unlisted for privacy.
- Vimeo Live / event platforms: More privacy controls, cleaner viewer experience, can cost more.
- Zoom: Interactive (guests can chat), but requires more moderation and can feel less “cinematic.”
- Private streaming services: Built for weddings with RSVP-style access, guestbooks, and replays.
Privacy checklist
- Use password protection or unlisted links.
- Share the link only with guests who need it.
- Decide whether you’ll disable comments/chat or appoint a moderator.
- Confirm if the platform automatically records and who can download the recording.
Step 4: Confirm Your Venue’s Internet and Create a Backup Plan
This is where many couples get burned: they assume the venue’s Wi-Fi will be enough. A room full of guests posting stories can crush bandwidth fast.
Questions to ask your venue (copy/paste)
- What is the upload speed in the ceremony location (not just the lobby)?
- Is there a dedicated network option for events?
- How many users typically connect during weddings?
- Are there dead zones or thick walls that affect service?
- Can we plug in via Ethernet?
Simple backup options
- Dedicated hotspot: A reliable 5G hotspot can save the day.
- Two-network plan: Stream on hotspot, keep venue Wi-Fi for personal devices.
- Local recording: Even if the stream drops, you still have a clean video to share later.
Step 5: Prioritize Audio (Because Vows Are the Main Event)
Remote guests want to hear your vows, your officiant, and your readings. Wind, distance, and echo can ruin a stream even with great video.
Audio options by setup
- DIY ceremony: Phone placed close + external mic (lav mic or small shotgun mic) is a big upgrade.
- DJ/PA system on site: Ask if you can get a feed from their mixer to your streaming device.
- Professional team: They’ll typically mic the officiant and/or couple and capture clean audio.
Pro tip from wedding planners
Do a “vow volume check” at rehearsal: stand where you’ll stand, speak at normal emotion-level volume (usually softer than you think), and listen back on a test recording. Adjust mic placement before wedding day.
Step 6: Decide on DIY vs. Hiring a Pro (and How to Choose)
DIY can absolutely work for smaller, simpler weddings—especially indoors with stable internet. Pros make sense if you’re streaming to a lot of people, dealing with tricky lighting, or you want multiple camera angles.
DIY is a good fit if:
- You’re streaming the ceremony only.
- You have one stable camera position with a clear view.
- You have a confident helper who won’t be distracted by wedding emotions.
Hire a pro if:
- You want a multi-camera wedding live stream.
- Your venue has challenging sound or lighting (outdoors at dusk is a classic trouble spot).
- You need a reliable setup for many virtual guests (50+).
- You want a polished recording afterward.
Questions to ask a streaming vendor
- How do you handle audio capture for vows?
- Do you bring your own internet solution?
- Is a recording included, and how is it delivered?
- What happens if equipment fails—what’s your backup?
- How do you protect guest privacy (passwords, unlisted links)?
Step 7: Create a Live Stream Timeline (So It Doesn’t Add Stress)
Your wedding timeline already has plenty of moving parts. Streaming works best when it’s treated like a vendor with its own arrival time, setup time, and cues.
Sample ceremony-only streaming timeline
- 90 minutes before: Setup (camera position, audio, power, internet test)
- 45 minutes before: Private test stream + sound check
- 20 minutes before: “Virtual guests, we’ll begin soon” holding screen/music
- 5 minutes before: Start recording (even if you go live slightly later)
- Ceremony start: Go live (or confirm stable stream)
- After ceremony: Keep stream up for 2–3 minutes for a recessional + a quick wave
Where streaming fits into your overall planning timeline
- 3–6 months out: Decide DIY vs pro, choose platform, confirm venue internet options
- 2–3 months out: Book vendor or assign helper, purchase/rent equipment
- 4–6 weeks out: Send virtual guest info, confirm time zones, plan a moderator
- 1–2 weeks out: Full tech rehearsal, finalize link/password distribution plan
- Wedding week: Charge everything, print a one-page streaming run-of-show
Step 8: Make Virtual Guests Feel Included (Without Overcomplicating Things)
The best streamed weddings include small, intentional touchpoints. You don’t need to create a parallel event—just a few moments that acknowledge your virtual loved ones.
Easy ways to include remote guests
- Welcome message: Ask your officiant to greet virtual guests at the start.
- Virtual “front row”: Reserve the best camera angle and don’t let guests stand in front of it.
- Chat moderator: A cousin or friend can greet guests, answer tech questions, and keep things positive.
- Digital program: Share a simple PDF with ceremony details, readings, and names.
- Time zone friendly replay: If guests are overseas, a private recording link is a gift.
Real-world example: a grandparent watching from home
One couple we worked with streamed their ceremony for the bride’s grandmother in assisted living. They asked the officiant to pause briefly after the vows so the couple could look at the camera and say, “We love you, Nana.” That ten-second moment became one of the most cherished parts of their day—no fancy production required.
Common Mistakes to Avoid (and What to Do Instead)
- Mistake: Relying on venue Wi-Fi without testing it.
Do instead: Run a test stream from the exact ceremony spot and bring a hotspot backup. - Mistake: Placing the camera too far away “so it’s not in the way.”
Do instead: Prioritize a clear view of faces and the couple’s voices. A discreet tripod near the front works best. - Mistake: Forgetting audio entirely.
Do instead: Use an external mic or pull from the DJ’s soundboard. - Mistake: Assigning streaming to a wedding party member.
Do instead: Ask a non-essential guest or hire help so your closest people can be present. - Mistake: Sharing the link publicly.
Do instead: Use password protection and distribute privately through email or your wedding website. - Mistake: No plan for late starts.
Do instead: Start the stream early with a “We’ll begin soon” screen so guests don’t worry they missed it.
Planner Pro Tips for a Smooth Wedding Live Stream
- Do a “no one blocks the camera” plan: Ask ushers or the coordinator to keep aisles clear during the processional.
- Think about lighting: If you’re outdoors, avoid placing the camera directly into the sun. Golden hour is gorgeous, but it can confuse auto-exposure.
- Bring gaffer tape: Tape down cords for safety and clean visuals.
- Use airplane mode + Wi-Fi (or hotspot): Prevent interruptions from calls and notifications on the streaming device.
- Have a printed cheat sheet: Link, password, start time, platform login, and a 5-step troubleshooting list.
FAQ: Planning a Wedding With Live Streaming
What’s the best way to live stream a wedding privately?
Use an unlisted stream link with a password (or a platform that offers invitation-only access). Share it only with virtual guests via email or your wedding website guest portal.
How much internet speed do we need for a stable wedding live stream?
Aim for at least 5–10 Mbps upload for a single HD stream, more if you’re using higher resolution or multiple cameras. Test from the ceremony location at the same time of day your wedding will happen.
Should we live stream the reception too?
Usually, couples get the best results streaming the ceremony and maybe speeches. Receptions are darker, louder, and more unpredictable. If you do want reception coverage, consider a professional team or limit it to key moments (first dance, toasts).
How do we handle guests who are in different time zones?
Offer a recording afterward, and clearly communicate the ceremony time in multiple time zones (for example: “3:30 PM ET / 12:30 PM PT”). A replay link is especially helpful for overseas friends and family.
Can we use a phone to live stream our wedding?
Yes—many couples do. Use a sturdy tripod, keep the phone plugged into power, turn on airplane mode, and add an external microphone if possible. Assign a helper to monitor framing and connection.
Who should run the live stream on the wedding day?
Ideally, someone who is not in the wedding party and not emotionally pulled in a hundred directions. A tech-savvy friend, a coordinator’s assistant, or a hired streaming operator helps everything run calmly.
Your Next Steps: A Simple Action Plan
If you want a wedding live stream that feels seamless and heartfelt, focus on the basics: clear audio, stable internet, and a plan for who’s managing it.
- This week: Decide what you’re streaming (ceremony-only vs more) and draft your virtual guest list.
- Within 2 weeks: Ask your venue internet questions and choose your platform.
- Within 1 month: Book a pro or assign a dedicated helper; purchase/rent audio and stability essentials.
- 4–6 weeks before: Send the link plan (or “link coming soon”) to virtual guests and assign a moderator.
- 1–2 weeks before: Run a full test stream from the venue or a similar environment.
You’re not trying to create a perfect broadcast—you’re creating access for the people who love you. With a little planning, your streamed ceremony can feel intimate, intentional, and truly connected.
Looking for more planning support? Explore more practical wedding planning guides on weddingsift.com to keep every detail (tech included) simple, meaningful, and stress-light.
More Articles
 How to Choose Between All-Inclusive Venues and Blank Canvas Spaces
 White linen, dried pampas, and one thrifted brass tray—minimalist wedding decor that costs less than your dinner budget
 How to Plan a Wedding With a Surprise Element
 How to Set a Realistic Wedding Budget That Works
 How to Plan a Wedding With a Late-Night Snack Station
 How to Plan a Luxury Wedding Without Breaking the Bank
 How to Plan a Wedding With a Live Band
 How to Plan a Summer Wedding That Stays Cool
 Dusty sage and cream, navy and gold, charcoal and oat—palettes that never date
 Wedding Parking and Logistics Planning Guide