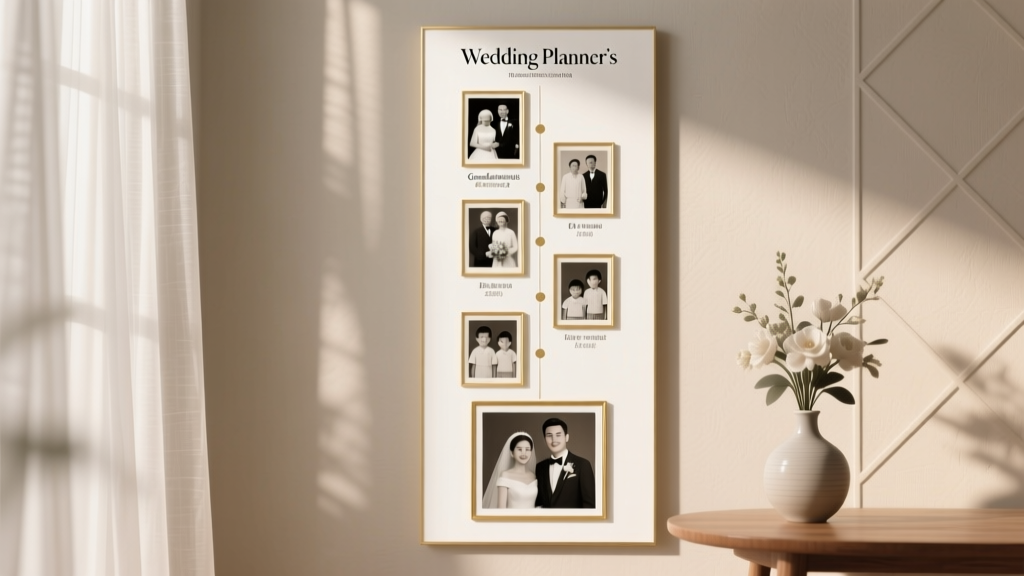
How to Plan a Wedding With a Family Photo Timeline
Family wedding photos are one of those “you’ll thank yourself later” parts of planning. Years from now, you’ll love seeing your grandparents beaming, your siblings laughing, your parents holding hands when they think no one is watching. The tricky part? Getting all the right people in the right place at the right time—without turning your wedding day into a stressful roll call.
If you’ve ever been in a wedding where family portraits took an hour longer than expected (and everyone grew more impatient by the minute), you already know why a family photo timeline matters. The good news is that with a little structure—and a few planner-style tricks—you can keep things efficient, calm, and surprisingly smooth.
This guide will help you build a realistic family photo timeline that fits your wedding day schedule, works with your ceremony and reception timing, and protects what matters most: your time with your guests and your peace of mind.
Why a Family Photo Timeline Makes Wedding Days Easier
A family photo timeline is a simple plan that answers three questions:
- When will family photos happen?
- Where will they happen?
- Who needs to be there—and in what order?
When couples skip this step, family portraits often spill into cocktail hour, dinner, or even the start of dancing. When you plan it well, you get:
- Less stress for you, your families, and your wedding party
- Better photos because everyone is fresher and more focused
- More time to actually enjoy your reception
- Fewer missing people (no more “Where’s Uncle Mike?” moments)
Step 1: Start With Your Wedding Day Flow (Ceremony, Cocktail Hour, Reception)
Before you decide when to take family photos, map the big blocks of time in your wedding day timeline. Most weddings fall into one of these structures:
Option A: Family photos after the ceremony (most common)
- Best if you’re not doing a first look
- Works well when the ceremony and photo location are close
- Requires a slightly longer cocktail hour (or very efficient grouping)
Option B: Family photos before the ceremony (great for tight schedules)
- Best if you’re doing a first look
- Lets you enjoy more of cocktail hour
- Requires family members to arrive early and be ready on time
Option C: Split family photos (a little before + a little after)
- Helpful for divorced families, travel constraints, or large extended families
- Requires careful communication so people know which time applies to them
Budget tip: If you’re trying to avoid paying for extra photography hours, a well-built family photo timeline helps your photographer cover everything within the coverage you booked.
Step 2: Decide Your Photo Priority List (Must-Haves vs. Nice-to-Haves)
Family photo time is limited. Even with a fast photographer, large groups take longer than expected—people blink, toddlers wander, someone steps away to the restroom, etc. Start by writing your list in two categories:
Must-have family photos
- Couple with each set of parents/guardians
- Couple with immediate family (parents + siblings)
- Couple with grandparents (or closest elder relatives)
- Couple with blended family groupings (step-parents, bonus siblings)
Nice-to-have family photos
- Couple with aunts/uncles
- Couple with cousins
- Big extended family “everyone in” shot
- Special groupings (godparents, chosen family, family friends)
Real-world scenario: If your guest list is 120 and your immediate family is small, you can often fit extended family photos into a 20–30 minute portrait window. If your guest list is 250 and you have lots of siblings and cousins, plan for longer—or keep extended photos to cocktail hour “as available” rather than a formal lineup.
Step 3: Choose the Best Time Slot for Family Photos
The best time depends on your ceremony time, travel, and whether you’re doing a first look. Here are typical portrait windows wedding planners use:
If you’re doing a first look
- 2–3 hours before ceremony: Couple portraits + wedding party + immediate family
- After ceremony: Any missing groupings + extended family quick shots
If you’re not doing a first look
- Immediately after ceremony: Couple + family + wedding party
- Cocktail hour: Couple portraits (golden light, if possible)
Timeline tip: For most weddings, budget 2–3 minutes per posed grouping with a prepared list and a helper rounding people up. Add buffer time for kids, elders, and large groups.
Step 4: Build Your Family Photo Shot List (With Efficient Grouping Order)
This is where the magic happens. A good shot list reduces chaos by keeping people “in” for multiple photos before releasing them. The best practice is to start with the largest grouping and work down to smaller ones—or vice versa—depending on mobility and family dynamics.
Sample family photo list (efficient order)
Couple + Partner A side
- Couple + Partner A parents/guardians
- Couple + Partner A parents + siblings
- Couple + Partner A siblings only
- Couple + Partner A grandparents
Couple + Partner B side
- Couple + Partner B parents/guardians
- Couple + Partner B parents + siblings
- Couple + Partner B siblings only
- Couple + Partner B grandparents
Both sides together (optional)
- Couple + both sets of parents/guardians
- Couple + immediate family on both sides
- Couple + grandparents (all)
Pro tip: If you have elderly relatives, photograph them early so they can sit down (or head to cocktail hour) quickly. If you have toddlers, do their photos early too—kids melt down on schedule, not on your timeline.
Step 5: Assign “Family Photo Captains” (This Step Saves Weddings)
Your photographer shouldn’t be stuck guessing who is “Aunt Lisa’s partner” or chasing down cousins. Choose 1–2 people who:
- Know the family faces and names
- Are comfortable speaking up
- Will stay sober and focused for this part of the day
Great options: a sibling, cousin, wedding party member, or planner/coordinator.
Give your photo captains a simple job description
- Hold the shot list (printed or on phone)
- Gather the next group while the current photo is happening
- Check people off as each photo is completed
- Help keep purses, jackets, and drinks out of photos
Budget-friendly tip: If you don’t have a coordinator, photo captains are a free way to add structure and keep your wedding day timeline on track.
Step 6: Pick the Photo Location (Light, Distance, and Comfort Matter)
The perfect family photo spot is close, shaded (or evenly lit), and accessible.
Location checklist
- Within 2–5 minutes of the ceremony site (walking is ideal)
- Even lighting (open shade, under trees, or a covered porch)
- Room to line up 10–25 people without feeling crowded
- Seating nearby for grandparents or anyone who needs breaks
- Weather backup (especially for outdoor weddings)
Real-world scenario: If your ceremony is in a church and your reception is 25 minutes away, do not assume family portraits can “just happen later.” Travel breaks momentum. It’s usually best to do family photos at the ceremony venue right after the ceremony, before anyone drives off.
Step 7: Add Buffer Time (Because Weddings Run on Real Life)
Even a well-planned family photo timeline needs breathing room. Build buffer time into your schedule so you’re not stressed if the ceremony starts late or guests take longer to exit.
Where to add buffer
- 10 minutes after ceremony for hugs, quick hellos, and crowd movement
- 5–10 minutes inside the family photo window for missing people
- 5 minutes before leaving for reception (if travel is involved)
Planner pro tip: If your cocktail hour is 60 minutes and you’re doing all family photos after the ceremony, you’ll feel much more comfortable with a 75–90 minute cocktail hour, especially for large families. That can be a budget increase (extra bar time, staffing), but it often prevents the reception from starting late.
Sample Family Photo Timelines (Realistic Wedding Day Examples)
Example 1: No first look, ceremony at 4:00 PM
- 3:30 PM Photographer arrives at ceremony site (details + guest arrivals)
- 4:00–4:30 PM Ceremony
- 4:30–4:40 PM Receiving line hugs + move to photo spot
- 4:40–5:10 PM Family photos (immediate family + grandparents)
- 5:10–5:30 PM Wedding party photos
- 5:30–6:15 PM Cocktail hour (couple portraits during first 20–30 minutes)
- 6:15 PM Guests invited to dinner
Example 2: First look, ceremony at 5:30 PM
- 2:30 PM Hair/makeup finishing touches
- 3:15 PM First look + couple portraits
- 4:00 PM Wedding party photos
- 4:30–5:00 PM Immediate family photos (both sides)
- 5:30–6:00 PM Ceremony
- 6:00–6:15 PM Quick extended family photos (optional)
- 6:15–7:15 PM Cocktail hour (you can actually attend!)
Example 3: Blended family + sensitive dynamics
- Photograph each parent/step-parent grouping separately first
- Then do “all together” shots only if everyone is comfortable
- Keep the shot list neutral and clear (names, not labels)
Pro tip: If there’s tension, your timeline should prioritize emotional comfort. You can absolutely get beautiful family photos without forcing combinations that create stress.
Common Mistakes to Avoid (And How to Fix Them)
- Mistake: No one knows where to go after the ceremony.
Fix: Put “Family Photos Immediately After Ceremony” in your program, signage, or announcements. Tell immediate family at the rehearsal. - Mistake: The shot list is too long.
Fix: Keep formal groupings focused. Do extended family photos at the reception more casually if needed. - Mistake: People are holding drinks/phones/sunglasses in photos.
Fix: Ask your photo captain to do a quick “hands check” before each grouping. - Mistake: Travel time wasn’t considered.
Fix: If locations differ, do family photos before anyone leaves—or build in a clear arrival buffer at the next venue. - Mistake: Not accounting for mobility needs.
Fix: Choose accessible locations, provide seating, and photograph elders early.
Wedding Planner Pro Tips for Smooth, Fast Family Photos
- Print the shot list for your photographer and photo captains. Phones die. Paper doesn’t.
- Use first names and simple relationships (ex: “Couple + Sarah & David (parents)”) to reduce confusion.
- Keep the background consistent by staying in one spot if possible—moving locations wastes time.
- Tell VIPs to stay nearby for 20–30 minutes after the ceremony (parents, siblings, grandparents).
- Consider a “photo-friendly” ceremony exit (bubble send-off, petals, or simple applause line) so guests don’t scatter instantly.
Budget Considerations: What Impacts Photo Timeline Costs?
Your family photo plan can affect more than just your schedule. It can influence vendor hours and overall wedding budget.
- Photography hours: A longer portrait window may require additional coverage time.
- Cocktail hour length: Extending cocktail hour can increase bar, catering, and staffing costs.
- Coordination support: A day-of coordinator can keep the timeline moving (or use photo captains if you’re DIY-ing).
- Transportation: Multiple locations can require shuttles or extra time buffers (which can add cost).
Money-saving move: If you want lots of family photos but don’t want to extend cocktail hour, do a first look and schedule immediate family photos before the ceremony.
FAQ: Family Photo Timeline Planning
How long should family wedding photos take?
For immediate family only, plan 20–40 minutes. If you’re including extended family, plan 45–75 minutes depending on size, mobility needs, and how organized your shot list is.
Should we do family photos before or after the ceremony?
If you’re doing a first look, before-the-ceremony family photos are often easiest. If you’re not doing a first look, family photos typically happen right after the ceremony while everyone is already present.
How do we handle divorced parents or blended families in the photo timeline?
Create separate groupings and keep the order smooth: photograph each household grouping first, then only do combined photos if everyone is comfortable. Share the plan privately with the people involved so there are no surprises.
What if someone we need for photos is late or disappears?
Assign a photo captain to track VIPs, and build a 5–10 minute buffer. If someone is missing, move on to the next grouping and circle back—don’t let one person stall the whole timeline.
Do we need a detailed shot list if our photographer is experienced?
Yes. Your photographer knows how to pose and light photos, but you and your families know who matters most. A shot list prevents regrets like realizing later you never got a photo with your grandparents or siblings.
Can we do extended family photos at the reception instead?
Absolutely. If you’d rather keep formal portraits short, you can do immediate family photos formally, then grab cousin/aunt/uncle photos casually during reception downtime (table visits, dance floor breaks, or golden hour).
Your Next Steps: Build a Timeline That Protects Your Joy
To get this done quickly, set aside 30 minutes this week and:
- Choose your family photo window (before ceremony, after, or split).
- Write your must-have list (then trim it until it feels realistic).
- Pick 1–2 photo captains and send them the list.
- Confirm your photo location and a weather backup.
- Share the final plan with your photographer and coordinator (if you have one).
You deserve to feel present on your wedding day—not pulled in ten directions. A thoughtful family photo timeline gives you structure, keeps loved ones comfortable, and makes space for the celebration you’ve been planning.
Want more support? Explore more practical wedding planning guides on weddingsift.com to keep your timeline, budget, and big day feeling beautifully manageable.
More Articles
 How to Handle Wedding Vendor Meals
 Wedding Planning How to Choose Reception Entertainment
 Wedding Planning Tools and Templates That Save Time
 Micro Wedding Planning Guide for Intimate Celebrations
 How to Plan a Themed Wedding From Concept to Execution
 Wedding Planning How to Manage Vendor Setup Times
 Wedding Planning Vendor Team Building Tips
 Wedding Planning During a Pandemic What Changed Forever
 How to Plan a Wedding Reception With Multiple Speeches
 How to Plan a Wedding With a Welcome Reception