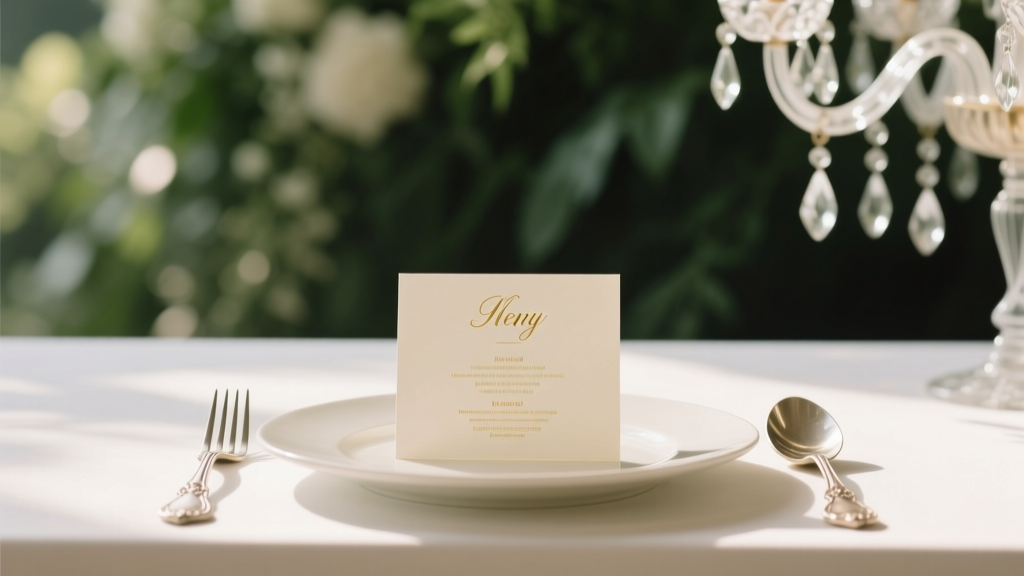
Wedding Planning How to Choose the Perfect Menu Cards
You’ve picked the date, you’re juggling guest counts, and you’ve probably spent more time thinking about napkin colors than you ever expected. Somewhere in the middle of all those big decisions, menu cards can feel like a tiny detail. But on the wedding day, they’re one of the most “felt” paper items—because they meet guests right where celebration happens: at the table, drink in hand, ready to enjoy.
The right menu cards do more than list courses. They help guests feel cared for (especially anyone with dietary needs), set expectations (family-style? plated? buffet?), and add a polished, intentional touch to your tablescape. If you’ve been wondering what style you actually need, what to include, or how to keep it within budget, this guide will walk you through it like a planner friend who’s done this a hundred times.
Below you’ll find clear options, timelines, budget-friendly ideas, and common mistakes to avoid—plus pro tips to make your wedding menu cards look beautiful and work hard for you.
What Menu Cards Really Do (Beyond Looking Pretty)
Menu cards are both design and logistics. When done well, they:
- Reduce confusion about what’s being served and when (especially with multi-course dinners).
- Support dietary needs by clearly marking vegetarian, vegan, gluten-free, nut-free, dairy-free, or halal options.
- Elevate your tables with color, typography, and personal touches that tie into your wedding stationery suite.
- Create conversation—guests love reading playful dish names, local ingredients, or cultural nods.
- Help service flow (particularly for plated meals where guests may have pre-selected entrées).
Step 1: Choose the Right Format for Your Meal Style
Before you pick fonts or paper, decide what kind of menu card makes sense for how guests will eat. Here are the most common formats and when they work best.
Individual Menu Cards (One per Place Setting)
Best for: plated dinners, formal receptions, or when you want a luxe, cohesive look.
- Placed on top of the napkin, tucked into the napkin fold, or set above the charger.
- Great for guiding guests through multiple courses.
- Easy to personalize (for example, adding guest names if you’re combining menus with place cards).
Table Menus (One or Two per Table)
Best for: semi-formal weddings, family-style meals, or when you want to save on printing.
- Often designed as a small tent card, stand-up card, or a flat card in a holder.
- Works well if everyone is eating the same meal or if entrée choices were selected in advance.
- Ideal for long farmhouse tables where guests can easily share one menu.
Buffet Signage or Display Menus
Best for: buffets, stations, cocktail-style receptions, and more casual weddings.
- Consider a larger printed menu on an easel near the buffet or bar.
- Pair with small station labels (especially for allergens and spice levels).
- Helps prevent bottlenecks—guests can decide before they reach the front of the line.
Combined Pieces (Menu + Place Card + Favor Tag)
Best for: couples trying to streamline stationery and reduce clutter on the table.
- One card can serve multiple purposes: menu on one side, guest name and table number on the other.
- Works beautifully for minimalist weddings and smaller guest counts.
Step 2: Decide What to Include on Your Menu Cards
Your menu card should feel helpful, not overwhelming. Most couples include:
- Course headings (e.g., “First Course,” “Main,” “Dessert,” “Late Night”).
- Dish names with a short description (keep it simple and appetizing).
- Dietary indicators (V, VG, GF, DF, NF) as needed.
- Bar highlights if you have signature cocktails or a featured wine pairing.
Optional extras that can be lovely when used intentionally:
- A personal note like “Thank you for celebrating with us.”
- A cultural or family detail (“Nonna’s lemon cookies,” “Dad’s favorite bourbon cocktail”).
- Local ingredient nods (“Farm-grown heirloom tomatoes from Cedar Hill”).
- A timeline cue (“Dessert will be served after speeches”). Keep this minimal so it doesn’t read like a program.
How Detailed Should Descriptions Be?
A good rule: 1 line per dish unless the dish is unfamiliar or you’re highlighting something special (like a locally sourced tasting menu). Guests mostly want clarity—especially if they’re avoiding specific ingredients.
Step 3: Match Your Menu Card Style to Your Wedding Aesthetic
Menu cards are a key part of your wedding tablescape, so they should coordinate with your overall wedding stationery and decor. Start with what you already have: your invitations, save the dates, and day-of signage style.
Design Elements to Consider
- Typography: One elegant font + one simple font is usually enough. Too many fonts can look busy.
- Color palette: Match your wedding colors or neutrals that complement your florals.
- Paper: Smooth matte for modern, textured cotton for classic, vellum for airy and romantic, recycled kraft for rustic.
- Printing style: Digital (budget-friendly), letterpress (luxury), foil (glam), or thermography (raised ink look).
- Shape and size: Tall and narrow for place settings, small tent cards for table menus, larger for buffet displays.
Real-World Style Scenarios
- Garden wedding with soft florals: A deckled-edge menu card on textured paper with a watercolor floral header.
- Modern city wedding: Minimal black-and-white menu with clean typography and a single accent line in your signature color.
- Coastal celebration: Light blue ink on creamy paper, casual wording, and a small icon (shell, wave) that echoes your invitation suite.
- Fall barn wedding: Warm-toned paper, simple serif font, and a sprig of rosemary tied with twine—pretty and aromatic.
Step 4: Coordinate Menu Cards with Place Cards and Seating
This is where menu cards can become a planning tool, not just decor.
If You Have Entrée Choices
If guests selected chicken/fish/vegetarian on their RSVP, you have two popular ways to handle it:
- List all entrées on the menu and let guests remember what they chose. (Simplest for design, but can confuse guests.)
- Mark the chosen entrée subtly on the place card or menu—often with a small icon or colored dot. (Best for smooth service.)
Planner pro tip: If you’re marking meals, coordinate with your caterer on a clear code system (for example: red dot = beef, blue dot = fish, green dot = vegetarian). Make sure your waitstaff knows it too.
If You’re Doing Family-Style or Stations
- Family-style menus can list what will be placed on the table (so guests know what’s coming).
- Stations benefit from signage at each station plus a simple overview menu at the table or entrance.
Step 5: Get the Timing Right (So You’re Not Reprinting)
Menu cards depend on your final menu—and menus often change late in the process. Here’s a timeline that keeps you flexible and stress-free:
- 3–5 months before: Choose caterer and general menu direction. Start thinking about menu card style and format.
- 8–10 weeks before: Confirm meal style (plated, buffet, stations). Decide if you need dietary icons.
- 4–6 weeks before: Finalize menu wording with your caterer (including sauces and sides). Begin design and proofreading.
- 2–3 weeks before: Send to print once the menu is truly locked. Keep a small buffer for shipping.
- Wedding week: Assemble (if needed) and deliver to your planner/coordinator with table assignments.
Budget-friendly timing tip: If your caterer is finalizing one ingredient (like seasonal vegetables) late, write “seasonal vegetables” on the menu instead of listing a specific variety.
Budget Considerations: What Menu Cards Typically Cost
Menu cards can be as affordable or as luxe as you want. Your cost depends on quantity, printing method, paper, and whether you’re adding extras (like ribbon, wax seals, or calligraphy).
Ways to Save Without Sacrificing Style
- Print one menu per table instead of one per guest.
- Use digital printing on a nice paper stock for an elevated look at a lower price.
- Skip heavy embellishments and let typography do the work.
- Combine menu + place card into one piece.
- Reuse design elements from your invitations to avoid extra design fees.
When It’s Worth Splurging
- If your reception is very formal and menu cards are part of a layered, high-end place setting.
- If you’re hosting a multi-course dining experience and you want that “fine dining” feel.
- If stationery is a top priority for you and you’re building a cohesive wedding stationery suite.
A Simple Checklist: Choosing Your Menu Cards Step by Step
- Confirm your meal style: plated, family-style, buffet, stations, cocktail-style.
- Pick your menu format: individual, table, signage, or combo.
- Gather final menu details: dish names, sides, dietary options, signature drinks.
- Decide on dietary labeling: icons, notes, or separate allergen cards.
- Match your stationery style: fonts, colors, paper, printing method.
- Measure your table space: ensure the card fits with plates, glassware, and centerpieces.
- Proofread twice: confirm spelling, capitalization, and consistency with your invitation suite.
- Print with buffer time: aim for 2–3 weeks before the wedding.
- Pack smart: keep menus flat, labeled by table number, and hand off to your coordinator.
Common Mistakes to Avoid (and How to Fix Them)
- Mistake: Printing too early.
Fix: Wait until your caterer confirms the final menu. If you must print early, use flexible wording like “chef’s seasonal selection.” - Mistake: Tiny font guests can’t read in dim lighting.
Fix: Use at least 10–11pt for body text, more if your venue is candlelit or outdoors at night. - Mistake: Forgetting dietary clarity.
Fix: Add simple icons (V, VG, GF) or a brief note. If allergies are a concern, consider a separate allergen card per guest who needs it. - Mistake: Crowding the table.
Fix: If you already have place cards, favors, chargers, and lots of glassware, switch to one menu per table or use a slim, vertical design. - Mistake: Using overly fancy dish wording that confuses guests.
Fix: Keep it approachable. “Herb-roasted chicken, lemon pan sauce” is clear; a full paragraph is not necessary.
Wedding Planner Pro Tips for Menu Cards That Feel Thoughtful
- Use the menu as a “vibe cue.” A playful cocktail name or a meaningful family dish can make the evening feel personal.
- Think about photos. Menu cards often show up in detail shots. Clean typography and quality paper photograph beautifully.
- Coordinate with your florist. If your centerpieces are tall or lush, keep menus vertical or use a small stand so they’re visible.
- Consider your venue’s realities. Outdoor weddings may need thicker paper (wind) or menu holders (humidity).
- Order a few extras. You’ll want spares for keepsakes, vendor meals, and any last-minute table changes.
FAQ: Menu Cards for Weddings
Do I really need menu cards at my wedding?
No, they’re optional. But they’re helpful for plated or multi-course meals, guests with dietary restrictions, and couples who want a polished tablescape. If budget is tight, consider one menu per table or a buffet display menu instead.
How many menu cards should I order?
If you’re doing individual menus, order one per guest plus 5–10 extras. For table menus, plan 1–2 per table (more for long tables). Also order a few for vendor meals if they’ll be seated separately.
Should menu cards list all entrée options or only what each guest chose?
Most couples list all options to keep printing simple. If your caterer prefers clearer service (especially with multiple dietary meals), use a subtle marking system on place cards or the back of the menu to indicate each guest’s selection.
How do I handle allergens on menu cards?
Use simple labels (GF, V, VG, DF) where applicable, and avoid making broad “allergen-free” promises unless your caterer confirms it. For severe allergies, it’s smart to coordinate directly with the guest and caterer and use a discreet note for service staff.
When should I send menu cards to print?
Aim for 2–3 weeks before your wedding, after your final tasting and once the caterer confirms the menu. If your menu depends on seasonal availability, keep wording flexible so you don’t need a reprint.
What size should wedding menu cards be?
For individual place settings, a common size is 4x9 inches or 5x7 inches. For table menus, tent cards around 4x6 inches (folded) work well. If your tables are tight, go narrower and taller so it doesn’t compete with plates and glassware.
Your Next Steps: Make Menu Cards Easy and Beautiful
If you’re ready to choose your wedding menu cards, start with the meal style and the format that fits your tables. Then lock in your wording, keep the design consistent with your wedding stationery, and give yourself a little printing buffer so you’re not scrambling right before the big day.
Small details become part of the memories—especially the ones guests interact with during the happiest parts of the evening. Your menu cards are one of those details that can quietly say, “We thought of you,” to every person at the table.
When you’re ready for more practical, stress-lowering wedding planning advice, explore our other planning guides on weddingsift.com.
More Articles
 How to Plan a Wedding Venue Visit Efficiently
 Wedding Planning Tools and Templates That Save Time
 How to Plan a Wedding With a Photo Scavenger Hunt
 How to Plan a Wedding Reception With Multiple Speeches
 Ultimate Wedding Planning Checklist for Your Big Day
 How to Choose the Right Wedding Officiant
 Wedding Planning How to Manage the Reception Flow
 Wedding Day Weather Backup Plans That Actually Work
 Wedding Planning Checklist for the Month Before
 How to Plan a Wedding With a Late-Night Snack Station