How to Plan a Wedding With a Beautiful Place Cards Display
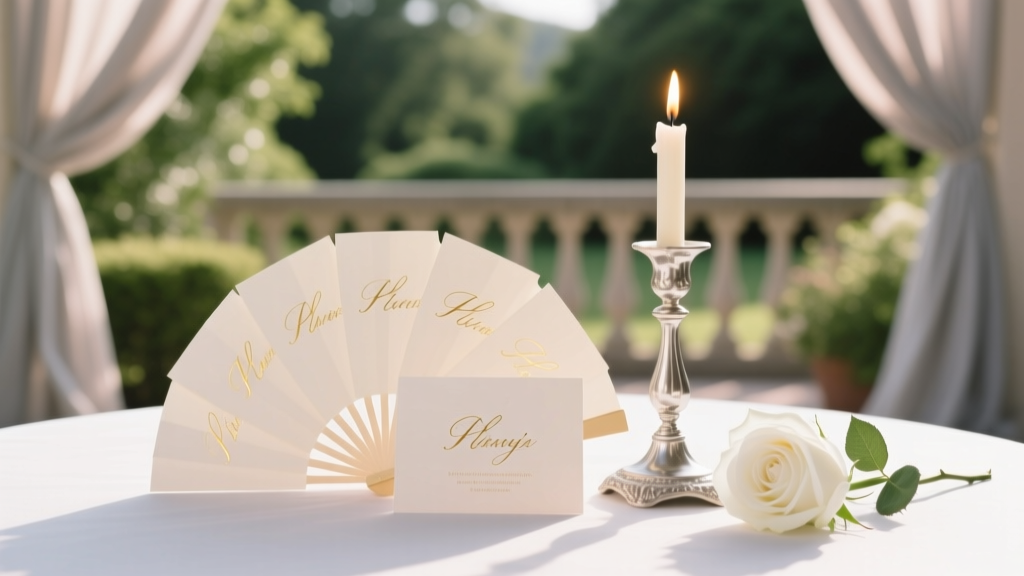
You’ve probably pictured the big moments—walking down the aisle, your first dance, the toast that makes everyone laugh-cry. But when guests arrive at your reception, one of the first things they interact with is much smaller: your place cards display. It quietly sets the tone, helps everyone feel cared for, and (when planned well) becomes one of those “Wait, this is so them” details.
If you’re juggling seating charts, family dynamics, meal choices, and a dozen other decisions, it can be tempting to treat place cards as a last-minute task. The truth is, a thoughtful place cards display can make your reception run smoother, reduce guest confusion, and add a beautiful focal point to your décor—all without blowing your wedding budget.
This guide walks you through planning a place cards display that’s practical, photo-worthy, and guest-friendly, with timelines, real-world scenarios, and pro tips you’ll be grateful for on wedding week.
What a Place Cards Display Really Does (Beyond Looking Pretty)
A place cards display is part organization, part hospitality, and part design. It should do three jobs at once:
- Direct guests quickly to the correct table and seat (especially for plated dinners).
- Support your wedding meal plan (meal indicators, allergies, and special notes when needed).
- Enhance your wedding décor with a styled moment that matches your theme and venue.
If you’re hosting 30 guests at a backyard dinner, you can keep it simple. If you’re hosting 180 guests in a ballroom with a cocktail hour that flows into a plated reception, a clear, well-placed display is the difference between a smooth start and a bottleneck of confusion.
Place Cards vs. Escort Cards vs. Seating Chart: Choose the Right Setup
Couples often use these terms interchangeably, but they aren’t the same. Picking the right format early helps you design smarter.
Quick definitions
- Place card: Sits at the guest’s seat and typically includes their name (sometimes meal choice).
- Escort card: Found at the entrance to the reception; directs the guest to a table (sometimes also to a seat).
- Seating chart: One large display listing guest names and assigned tables (and sometimes seat numbers).
How to decide
- Plated dinner: You’ll usually want escort cards + place cards (or escort cards that also act as place cards) to keep service accurate.
- Buffet: A seating chart is often enough, plus optional place cards for a polished look.
- Family-style: Escort cards or a seating chart works well; place cards are optional unless you need specific seats.
- Open seating: Skip place cards entirely, but consider table signs or reserved tables for family/bridal party.
Real-world scenario: If you’re having a plated steak/fish/vegetarian dinner, do not rely on a seating chart alone unless your catering team explicitly confirms they can track meal choices another way. A place card with a subtle meal indicator saves your guests from being asked “Chicken or fish?” at the table.
Step-by-Step: Plan Your Place Cards Display from Start to Finish
Step 1: Confirm your reception layout and service style
Before you design anything, lock in the basics with your venue/caterer:
- Total guest count estimate and capacity
- Table shapes and sizes (rounds, long farm tables, mixed seating)
- Number of tables and table numbering plan
- Dinner service style (plated, buffet, family-style)
- Any meal choice or allergy labeling requirements
Planner pro tip: Ask where the guest flow naturally begins after cocktail hour. That’s where your display belongs—visible, well-lit, and not blocking a doorway.
Step 2: Decide what information goes on the card
At minimum, include the guest’s name. Then decide if you need:
- Table number or name (especially if using escort cards)
- Assigned seat (more common for long tables or family dynamics)
- Meal indicator (dot, icon, color stripe, tiny letter on the back)
- Dietary notes (best kept discreet; coordinate with caterer)
Specific scenario: You have two guests with severe nut allergies. Rather than writing “NUT ALLERGY” on the front, coordinate with your caterer and add a tiny symbol on the back corner or a color-coded dot system your catering captain understands.
Step 3: Build your seating plan first (then design)
Your display design is the fun part, but it should come after the seating plan is stable. Use a simple checklist:
- Start with VIP tables: immediate family, wedding party, elders
- Group guests by comfort level (friends from college, coworkers, cousins, etc.)
- Balance personalities and energy (too many quiet guests at one table can feel stiff)
- Note accessibility needs (near restrooms, away from speakers, aisle space)
- Confirm kids’ seating and high chairs with the venue
Budget-friendly tip: If you’re changing RSVPs constantly, delay printing until your RSVP deadline has passed and you’ve done a final follow-up. Rush reprints add up quickly.
Step 4: Choose a display style that fits your wedding aesthetic (and venue)
Beautiful place cards displays don’t all look the same. Pick one that matches your wedding theme and works in your space.
Popular place cards display ideas
- Classic escort card table: Cards in alphabetical order on a linen table with candles/flowers
- Wall or hanging installation: Cards clipped to a grid, mirror, pegboard, or suspended on ribbons
- Champagne wall escort cards: Cards attached to flutes (great for a celebratory moment)
- Garden-inspired: Cards tucked into potted herbs, fruit displays, or floral foam (securely!)
- Minimal modern: Acrylic cards on metal stands, monochrome typography, clean lines
- Vintage: Antique frames with escort cards, old keys with tags, library card catalog vibes
Real-world scenario: You’re getting married at a historic venue with ornate interiors. A mirrored seating chart with calligraphy and soft florals will look intentional. The same mirror at a rustic barn might feel out of place—there, try kraft paper escort cards with wax seals or pressed flowers.
Step 5: Plan the mechanics: order, visibility, and traffic flow
The most common issue with place cards displays isn’t the design—it’s guest congestion. Make yours easy to use:
- Sort alphabetically by last name (A–Z sections), not by table number only
- Use clear signage that says “Find Your Seat” or “Escort Cards”
- Give it space (at least 6–8 feet of open area in front when possible)
- Light it well (especially for evening weddings)
- Keep it stable (no wobbly easels or cards that fly in outdoor wind)
Planner pro tip: For 120+ guests, consider two identical sets of escort cards on both sides of a table (or two displays) to cut the line in half.
Step 6: Coordinate materials, printing, and calligraphy without stress
Your place cards are a detail guests see up close, so readability matters more than fancy fonts.
- Choose a legible font or calligraphy style (test it from standing height)
- Match your paper goods (in color palette and tone) without over-matching
- Order extra blanks (5–10%) for last-minute guests or spelling fixes
- Proof names carefully (more on this in mistakes to avoid)
Budget considerations:
- DIY printable place cards: Affordable, best for simple tent cards
- Professional printing: Mid-range cost, consistent quality, faster than DIY when you’re busy
- Calligrapher: Higher cost, gorgeous keepsake feel; consider using calligraphy only for the couple’s table or VIPs if budget is tight
Timeline: When to Plan and Finalize Your Place Cards Display
Here’s a wedding planning timeline that keeps you ahead of the crunch:
- 3–4 months before: Decide on format (escort cards vs seating chart + place cards) and rough display concept
- 8–10 weeks before: Confirm table count, linen sizes, and display location with venue
- 6–8 weeks before: Source materials, order stands/frames, book calligrapher if using one
- 4 weeks before: Start seating plan draft using RSVP list
- 1–2 weeks before: Finalize seating chart; send print-ready list to stationer/calligrapher
- 3–5 days before: Assemble cards, sort alphabetically, pack display kit
- Wedding day: Assign someone (planner/coordinator/trusted friend) to set it up 60–90 minutes before guests enter reception
Real-world scenario: If your RSVP deadline is 3 weeks before the wedding, you’ll often still be chasing 5–10% of guests. Build that into your plan and avoid scheduling calligraphy for the day after RSVPs are due.
Design Details That Make the Display Feel Intentional
You don’t need an elaborate installation for a “wow” moment. Focus on a few high-impact elements:
- Layered height: Use risers, stacked books, crates, or acrylic blocks
- Framing: Add a welcome sign or framed heading that ties into your wedding signage
- Color story: Pull one or two colors from your flowers or bridesmaid dresses
- Texture: Handmade paper, vellum, linen, wood, or acrylic to match your vibe
- Personal touch: A short note like “We’re so glad you’re here” or a meaningful motif
Guest experience tip: If you have older guests, avoid ultra-light ink colors (like pale gold on cream). It photographs well but can be hard to read in dim light.
Common Mistakes to Avoid (and What to Do Instead)
- Mistake: Putting the display where guests enter a narrow doorway.
Do instead: Place it along a wide wall or open corner so people can step aside while searching. - Mistake: Organizing by table number only.
Do instead: Organize alphabetically by last name, with clear A–F, G–L, etc. dividers. - Mistake: Waiting to print until the night before.
Do instead: Finalize 1–2 weeks ahead, and keep 10 blank cards + a matching pen for emergency adds. - Mistake: Overcomplicated meal indicators guests can’t decode.
Do instead: Use a simple system your catering team approves (colored dots, small icons, or subtle letters). - Mistake: Misspelled names or incorrect titles.
Do instead: Ask a detail-oriented friend to proof your list, and double-check cultural naming conventions.
Wedding Planner Pro Tips for a Smooth Reception Start
- Create a “place cards kit” with tape dots, extra pens, mini scissors, clips, and a lint roller.
- Assign responsibility to one person (planner/coordinator/venue captain). Too many helpers can scramble the order.
- Weather-proof outdoor displays with heavier stands, clip systems, and a backup plan indoors.
- Use place cards as favors (carefully): If your place cards double as mini honey jars or ornaments, confirm guests can still find names quickly. Sometimes favors are better placed at the seat while escort cards handle navigation.
- Photograph it early: Ask your photographer for 2 minutes of detail photos before guests arrive—especially if the display is near a high-traffic area.
FAQ: Place Cards Display Planning
Do I need both escort cards and place cards?
Not always. For a plated dinner, you often need a way to guide guests to the correct table (escort cards or seating chart) and a way to identify seats and meal choices (place cards). For buffet or more casual receptions, a seating chart plus optional place cards is usually enough.
How do I indicate meal choices on place cards without making it obvious?
Use a discreet system approved by your caterer: a colored dot on the back, a tiny icon in a corner, or a small letter code. Make sure your catering captain has the key and that servers are trained on it.
What’s the most guest-friendly way to organize escort cards?
Alphabetical by last name, with clear dividers (A–F, G–L, etc.). If you have many guests with the same last name, add first names in a slightly larger font to speed things up.
How much should I budget for place cards and the display?
It ranges widely. DIY tent cards can be very affordable, while custom acrylic and calligraphy can add up. A practical mid-range approach is professional printing for the cards and a rented or thrifted display setup (frames, easels, mirrors) dressed with a few floral accents.
When should I print place cards?
Aim for 1–2 weeks before the wedding, after you’ve finalized RSVPs and your seating plan. Keep a small set of blank extras for last-minute changes.
What if someone doesn’t show up or I get a surprise guest?
No-shows happen. For surprise adds, your backup plan is blank cards, a matching pen, and a coordinator who can quietly adjust seating. If you expect changes, leave one or two flexible seats at a couple of tables without making it feel empty.
Next Steps: Make It Beautiful, Make It Easy
If you want a place cards display that feels effortless on the day-of, focus on three things: a finalized seating plan, a simple organizational system, and a setup that works with your venue’s flow. Once those are handled, the styling becomes the fun part—candles, florals, frames, and the little details that make your guests feel welcomed.
Your next steps:
- Confirm service style and meal labeling needs with your caterer
- Choose your format (escort cards, seating chart, place cards—or a combo)
- Pick a display style that fits your venue and guest count
- Build in time for proofing, printing, and a small “emergency extras” plan
When you’re ready for more wedding planning support—from seating ideas to reception timelines—explore more practical guides on weddingsift.com.
More Articles
 How to Plan a Wedding With a Live Streaming Option
 Wedding Vendor Cancellation Policies What to Know
 Wedding Planning How to Choose Reception Entertainment
 How to Handle Wedding Planning With Family Drama
 Wedding Day Vendor Meal Breaks Scheduling Guide
 How to Plan a Wedding Reception With Multiple Speeches
 Wedding Planning Mistakes First-Time Planners Make
 Wedding Planning Power and Electricity Needs at Venues
How to Choose the Best Wedding Catering Style
Wedding Planning Power and Electricity Needs at Venues
How to Choose the Best Wedding Catering Style
 Wedding Vendor Payment Schedule Best Practices