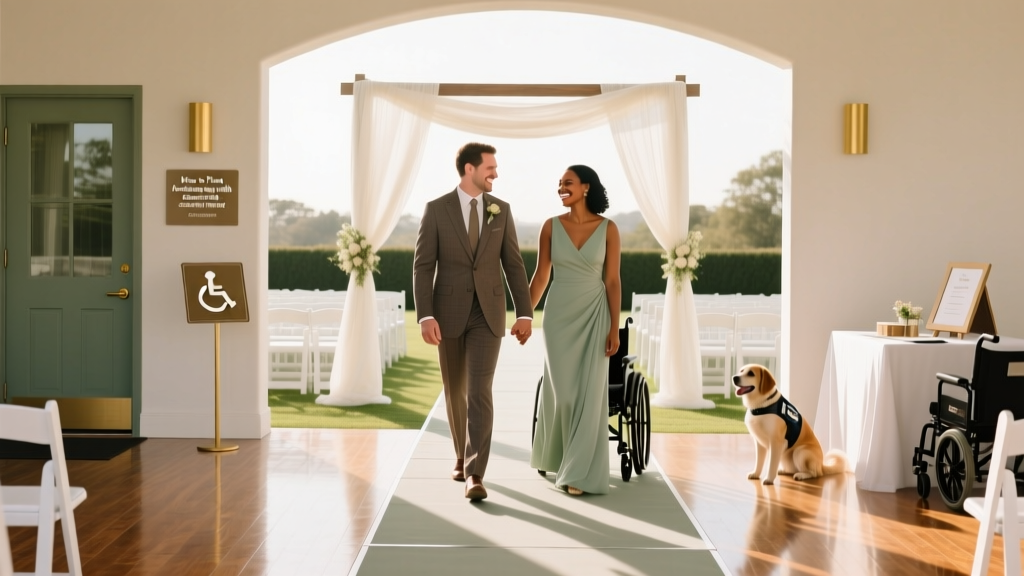
How to Plan a Wedding With Accessibility in Mind
When you picture your wedding day, you probably imagine the people you love most all in one place—laughing, tearing up during your vows, and celebrating with you late into the night. Accessibility planning is how you turn that picture into reality for everyone on your guest list, including loved ones with disabilities, chronic illnesses, sensory needs, and mobility considerations.
Many couples want an inclusive, welcoming wedding, but they’re not always sure where to start. You might be navigating a parent who uses a wheelchair, a best friend who’s Deaf or hard of hearing, guests who can’t stand for long periods, or a child who gets overwhelmed by noise and crowds. None of this has to make wedding planning stressful. With a little forethought (and the right questions), accessibility becomes a natural part of your wedding checklist—just like choosing your venue or finalizing your timeline.
This guide walks you through practical, budget-aware ways to plan an accessible wedding—step by step—so your guests can focus on celebrating with you, not struggling to participate.
What “Accessible” Really Means (and Why It’s More Than a Ramp)
Accessibility is about removing barriers so guests can participate comfortably and safely. That can include physical access, communication access, sensory-friendly options, dietary needs, and health-related considerations.
- Mobility access: parking, entrances, ramps/elevators, aisle width, flooring, seating, restrooms, and pathways.
- Communication access: captions, ASL interpreters, microphones, hearing assistance systems, clear signage, and printed materials.
- Sensory access: lighting, sound levels, quiet spaces, predictable schedules, and crowd management.
- Medical and comfort needs: temperature control, medication storage, oxygen accommodations, nearby seating, rest breaks, and hydration.
- Dietary access: allergen-friendly meals, clearly labeled food, and safe preparation practices.
A helpful mindset shift: you’re not planning “special accommodations.” You’re designing a guest experience that works for a wider range of bodies, needs, and comfort levels—often benefiting everyone.
Start Early: How to Build Accessibility Into Your Wedding Planning Timeline
Accessibility is easiest (and usually most affordable) when you plan for it from the beginning. Here’s a timeline that fits most wedding planning schedules.
12–9 months out: Venue-first accessibility check
- Choose a venue that’s accessible from the start (instead of trying to “make it work” later).
- Ask about inclusive restrooms, parking, and elevator access.
- Consider ceremony + reception in one location to reduce transportation barriers.
9–6 months out: Vendor and layout planning
- Book vendors who can support accessibility needs (DJ/MC who uses microphones well, caterer who handles allergens carefully, etc.).
- Sketch a preliminary floor plan with wide pathways and accessible seating options.
- Explore ASL interpreters and captioning if needed—these often book up early.
6–3 months out: Guest communication + details
- Add an accessibility question to RSVPs.
- Share practical access info on your wedding website (parking, terrain, restrooms, noise levels).
- Plan signage, seating cards, and ceremony programs with readable fonts and clear contrast.
3–0 months out: Final confirmations + day-of support
- Do a walk-through with accessibility in mind (not just decor).
- Confirm ramps/elevators are operational and unlocked during event hours.
- Assign a point person (planner, coordinator, or trusted friend) to help troubleshoot quietly.
Choosing an Accessible Wedding Venue: A Practical Walk-Through
Your venue sets the foundation for everything. When touring venues, don’t be afraid to ask detailed questions—even if the venue says “we’re ADA compliant.” Compliance isn’t always the same as comfort.
Venue tour checklist (bring this with you)
- Parking: Is accessible parking available, clearly marked, and close to the entrance? Is there a curb cut?
- Pathways: Are paths smooth and wide enough for wheelchairs/walkers? Any gravel, cobblestones, steep slopes, or grass?
- Entrances: Step-free entry? If there’s a ramp, is the incline manageable? Are doors heavy?
- Elevators: If the event spans floors, is there a working elevator? What’s the backup plan if it’s out?
- Restrooms: True accessible stall with turning radius, grab bars, and sink access? Is it close to the main spaces?
- Seating flexibility: Can you create wheelchair spaces within family seating, not off to the side?
- Lighting + sound: Are there harsh strobes, echo-y rooms, or limited control over volume?
- Temperature: Reliable HVAC? Shade options outdoors? Nearby indoor backup space?
Real-world scenario: The charming garden venue
A couple falls in love with an outdoor garden ceremony space—until they realize the “aisle” is soft grass on a slope. Their solution: they choose a nearby patio space with smooth pavers for the ceremony, keep the garden for photos, and rent a few shaded lounge umbrellas for guests who need breaks from sun and heat. The wedding still looks like their dream; it just functions better for everyone.
RSVPs and Guest Communication: How to Ask About Accessibility Without Making It Awkward
Guests often won’t volunteer needs unless you invite them to. A simple question makes your wedding feel welcoming right away.
Accessibility-friendly RSVP wording
- “Do you have any accessibility needs or accommodations we can help with? (Mobility, hearing/vision, dietary/allergies, sensory, etc.)”
- “If you’d like, share anything that would help you feel comfortable at our ceremony or reception.”
What to put on your wedding website
- Terrain notes: “Ceremony is on a paved patio; reception is indoors.”
- Parking + drop-off instructions with a simple map.
- Restroom info: “Accessible restroom available on the main floor.”
- Sound/lighting heads-up: “DJ and dancing begin at 8 PM; no strobe lighting.”
- Contact: A day-of point person for questions (not the couple).
Pro tip: If a guest shares a need, respond with reassurance and a concrete plan. “Thanks for telling us—there will be reserved aisle seating near the exit, and we’ll make sure a ride can drop you right at the entrance.”
Ceremony Accessibility: Seating, Aisles, and Meaningful Inclusion
The ceremony is often the most structured part of the day—and the easiest to make accessible with a few intentional choices.
Ceremony planning checklist
- Reserved accessible seating: Create spaces integrated with family seating (not isolated).
- Chairs available: Even if it’s a “standing ceremony,” offer seating without making guests ask.
- Wide aisle: Ensure enough width for mobility devices and comfortable passing.
- Step-free route: Confirm the same entrance is used by everyone (no “back way” unless requested).
- Microphones: Mic the officiant and vow exchange. Guests with hearing loss benefit—and so does everyone in the back row.
- Programs: Large, readable font; high contrast; consider a digital version via QR code.
Example: Including a grandparent who can’t walk far
Instead of expecting Grandpa to navigate a long outdoor path, the couple arranges a golf cart shuttle from parking to the ceremony seating, reserves a front-row seat on the aisle, and shortens the pre-ceremony wait by starting on time. It’s a small coordination win that makes him feel truly included.
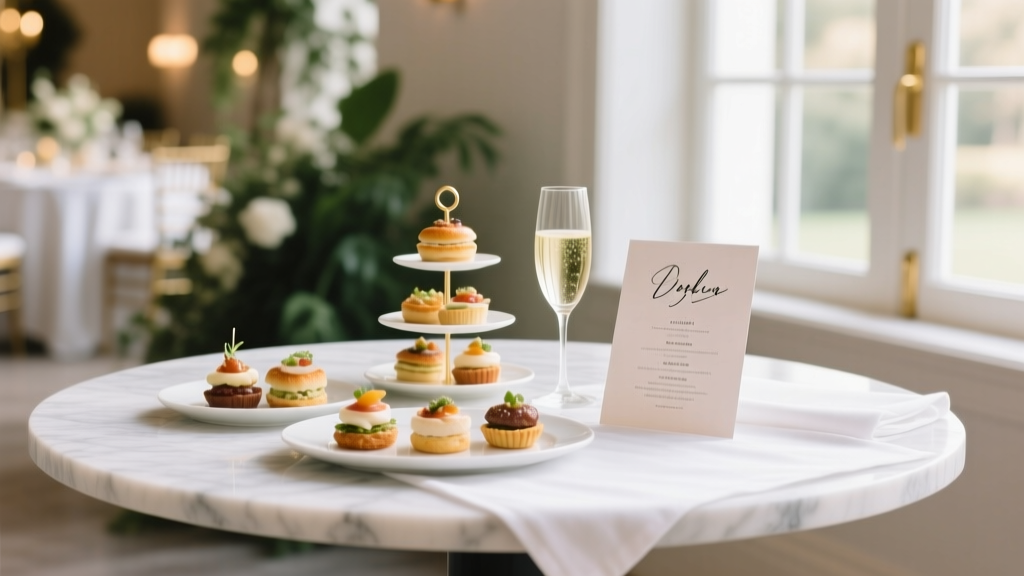
Reception Accessibility: Layout, Food, and Comfort
Receptions can get busy—cocktail hour crowds, tight table layouts, loud music, and long lines at bars or buffets. A few adjustments can make a huge difference.
Accessible reception layout tips
- Wider pathways: Leave extra space between tables (especially near restrooms and exits).
- Mixed seating options: Include some chairs with arms, lounge seating, and standard dining chairs.
- Consider flooring: Thick rugs, sand, or uneven outdoor surfaces can be tough for mobility devices.
- Place key moments thoughtfully: Make sure toasts, cake cutting, and first dance are visible from accessible seating areas.
Food and drink considerations (with budget in mind)
- Allergen-safe meals: Work with your caterer on cross-contamination protocols. If budget is tight, focus on clear labeling and a plated meal option for those who need it.
- Buffet strategy: If doing a buffet, ensure counters are reachable and staff can assist without drawing attention.
- Non-alcoholic options: Offer appealing NA drinks (sparkling water, mocktail, iced tea) for guests who can’t drink.
- Seated service for anyone who needs it: A server can bring a plate to a guest who can’t stand in line—often at no extra cost if planned in advance.
Quiet space = guest comfort win
A quiet room doesn’t need to be fancy. A side room with dimmer lighting, a few chairs, tissues, water, and a simple sign (“Quiet Space”) can help guests with sensory sensitivities, anxiety, migraines, or chronic fatigue recharge. Bonus: it’s also a lifesaver for parents with young children.
Communication Access: Music, Microphones, Captions, and Interpreters
If you have guests who are Deaf or hard of hearing—or guests who struggle to hear in noisy spaces—communication access is a key part of planning an inclusive wedding.
High-impact, often low-cost upgrades
- Use microphones consistently: For officiant, readers, and toasts. (Remind speakers to hold the mic close.)
- Reduce background noise during speeches: Pause bar service or lower music briefly.
- Printed or digital scripts: Provide ceremony readings and toast summaries in a program or on your wedding website.
- Clear signage: Large fonts, high contrast, and straightforward directions.
When to consider ASL interpreters or captioning
- If key guests use ASL, booking an interpreter is a meaningful way to include them fully.
- If you’re having a livestream, choose a platform that supports captions and test it ahead of time.
Budget note: interpreter costs vary by region and hours required. If full coverage isn’t feasible, consider interpreting the ceremony and toasts (the most content-heavy moments).
Transportation and Lodging: Make the Whole Weekend Accessible
Accessibility doesn’t stop at the venue doors. Think through how guests arrive, where they stay, and how they move between events.
Helpful planning steps
- Choose an accessible hotel block: Ask about accessible rooms (roll-in showers, grab bars) and how far in advance they must be reserved.
- Arrange transportation options: If you provide a shuttle, confirm if it can accommodate wheelchairs. If not, share local accessible taxi or rideshare options.
- Create a simple weekend itinerary: Include distances, terrain notes, and start/end times so guests can pace themselves.
Budgeting for Accessibility: What to Prioritize
Accessible planning doesn’t automatically mean expensive. Many of the best upgrades are logistical, not luxury. If you need to choose where to spend, prioritize changes that remove the biggest barriers.
Often free or low-cost
- Better signage and clear directions
- Reserved seating and wider aisles
- Consistent microphone use
- Quiet room setup
- Water stations and extra seating during cocktail hour
Common paid additions (plan early)
- Portable ramps (when safe and appropriate)
- Accessible restroom trailer (for outdoor/private property weddings)
- ASL interpreters
- Accessible transportation
- Extra staffing for plated service or guest assistance
Pro tip from planners: If accessibility is a priority, allocate a small “guest comfort” line item early—often 1–3% of your total wedding budget—and protect it like you would your photography budget. It’s part of the experience.
Common Mistakes to Avoid (and What to Do Instead)
- Mistake: Assuming “ADA compliant” means your event will be comfortable.
Do instead: Ask detailed questions about routes, restrooms, elevators, and surfaces. - Mistake: Putting wheelchair seating only at the back or on the edge.
Do instead: Integrate accessible seating throughout, especially with family and VIPs. - Mistake: Planning a long gap between ceremony and reception with nowhere to sit.
Do instead: Keep the timeline tight, offer seating immediately, and provide shade/temperature control. - Mistake: Skipping microphones because the room “isn’t that big.”
Do instead: Use mics for every spoken moment—guests will hear more and feel more included. - Mistake: Waiting until the final month to address access needs.
Do instead: Build accessibility into venue selection and vendor bookings from the start.
Planner Pro Tips for a Smooth, Accessible Wedding Day
- Do a “guest journey” walkthrough: Pretend you’re arriving with a walker, pushing a stroller, or navigating with low vision. Where are the friction points?
- Create a day-of accessibility plan: One page with notes like accessible entrances, elevator location, reserved seating list, dietary meal list, and the quiet room location.
- Assign a calm point person: A coordinator or trusted friend who can help discreetly (finding an accessible restroom, adjusting seating, calling transportation).
- Build in buffer time: If you have guests who move more slowly, allow extra arrival time and start key events on schedule to reduce fatigue.
- Practice inclusive language with vendors: “We have guests with mobility and sensory needs—can you walk us through how you handle volume, lighting, and layout?”
FAQ: Planning a Wedding With Accessibility in Mind
How do I ask guests about accessibility needs without sounding intrusive?
Keep it simple and optional. Add one line to your RSVP: “Do you have any accessibility needs or accommodations we can help with?” Guests can share only what they want, and it signals you care.
What are the biggest accessibility deal-breakers when choosing a wedding venue?
Common deal-breakers include no step-free entry, no accessible restroom, long distances over uneven terrain, and multiple levels with no reliable elevator. If a VIP guest can’t safely use the venue, it’s worth reconsidering early.
We’re on a tight budget—what accessibility improvements make the biggest difference?
Prioritize microphones, clear signage, reserved accessible seating, wider pathways, a quiet space, and sharing detailed logistics on your wedding website. These are often low-cost and high-impact.
Do I need to hire an ASL interpreter for my wedding?
If you have guests who use ASL and you want them to fully enjoy the ceremony and toasts, an interpreter is a wonderful option. If full-day coverage isn’t feasible, prioritize the ceremony and speeches.
How can we make an outdoor wedding more accessible?
Choose solid, level surfaces for key moments (ceremony, dining, restrooms), provide shade and seating, and avoid long routes over grass, gravel, or sand. If the property is remote, consider an accessible restroom trailer and a clear rain/heat backup plan.
Should we include accessibility information on our wedding website?
Yes—guests appreciate knowing what to expect. Include parking, terrain, entrances, restrooms, and a contact person for day-of questions. It reduces anxiety and helps guests plan ahead.
Your Next Steps: Make a Simple Accessibility Plan This Week
If you want a manageable starting point, here are three actions you can take right now:
- Add an accessibility question to your RSVP (paper or online) and update your wedding website with basic access details.
- Do a venue walkthrough focused on guest experience—parking to seat to restroom to exit—and write down any barriers.
- Choose one “comfort upgrade” you’ll commit to (quiet room, better signage, extra seating, or microphones for all speeches).
Planning an accessible wedding is one of the most caring things you can do as a host. It tells your guests, “You matter here exactly as you are,” and that feeling becomes part of what everyone remembers about your day.
For more supportive, practical wedding planning guides—timelines, checklists, and guest experience tips—explore the resources on weddingsift.com.
More Articles
 How to Set a Realistic Wedding Budget That Works
 How to Plan a Wedding With a Grand Exit
 Wedding Menu Tasting Guide What to Expect
 How to Plan a Wedding With a Photo Slideshow
 Wedding Planning for Short Engagements Survival Tips
 How to Plan a Wedding That Fits Your Personality
 How to Plan a Wedding With a Flower Wall
 Wedding Planning How to Manage the Getting Ready Process
 How to Plan a Luxury Wedding Without Breaking the Bank
 How to Choose the Right Wedding Officiant